Express Drainage Solutions

A Solution for Sanitation, Wastewater Treatment & Renewable Energy

Njengi House

2nd Floor Suite 6, Tom Mboya St.

8:00AM - 5:00PM

Monday to Friday

+254742781455

info@expresswatersolutions.com

All Posts By

Antony Muya

How to Redirect Heavy Water Runoff

How to Redirect Heavy Water Runoff

By | Drainage Systems | No Comments

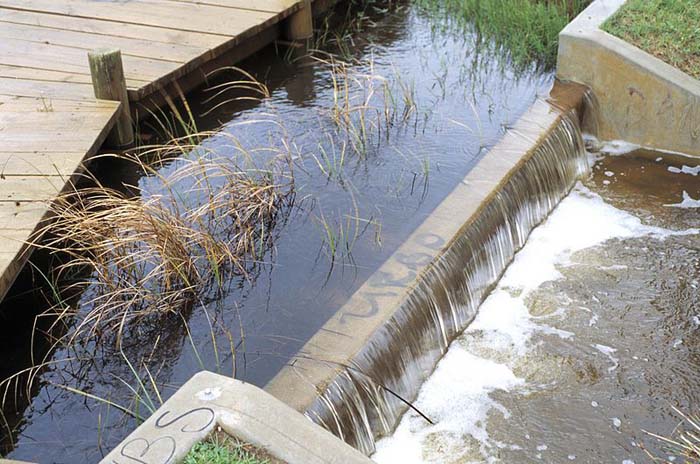
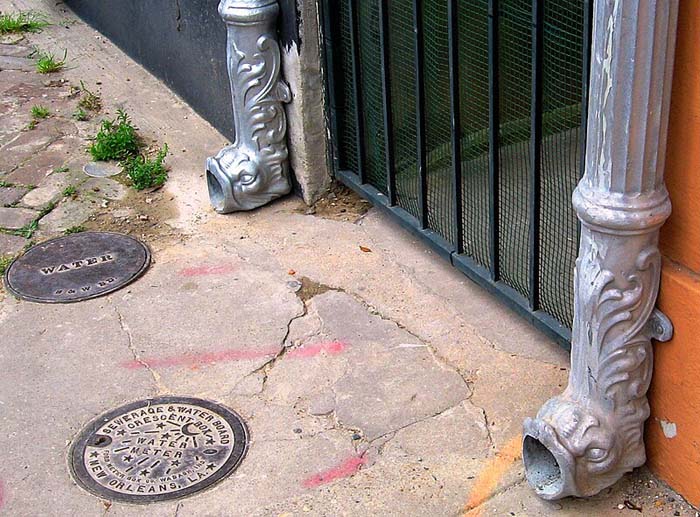
Water runoff refers to the movement of water across the land’s surface. This movement of water often occurs after irrigation, snowmelt, and rainfall. In addition to playing a vital role in the hydrological cycle, it has the potential to have both positive and negative effects on the ecosystem, as well as on human society.

Here’s How to Redirect Heavy Water Runoff

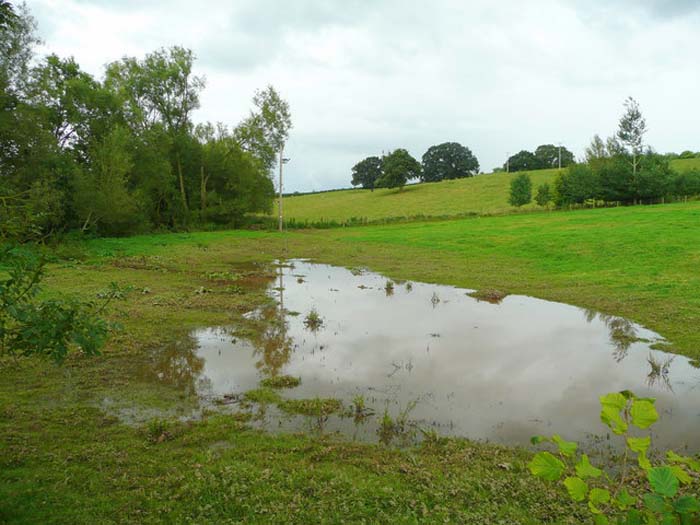
Redirecting heavy water runoff effectively prevents property damage, erosion, and flooding damage.

  1. Assess the landscape
  • Take stock of your property’s slope and natural drainage patterns.
  • Locate the areas where water accumulates or causes problems.
  • Locate the slopes, driveways, or downspouts that are causing a lot of water to run off the roof.
  1. Install drainage systems:
  • French Drains

A perforated pipe and gravel-filled ditches can divert water to a specific location.

  • Swales

Drains that are shallow and made of grass divert water away from buildings and into designated drainage areas.

  • Catch Basins

These take in runoff from the ground and channel it into drainage networks or underground pipes.

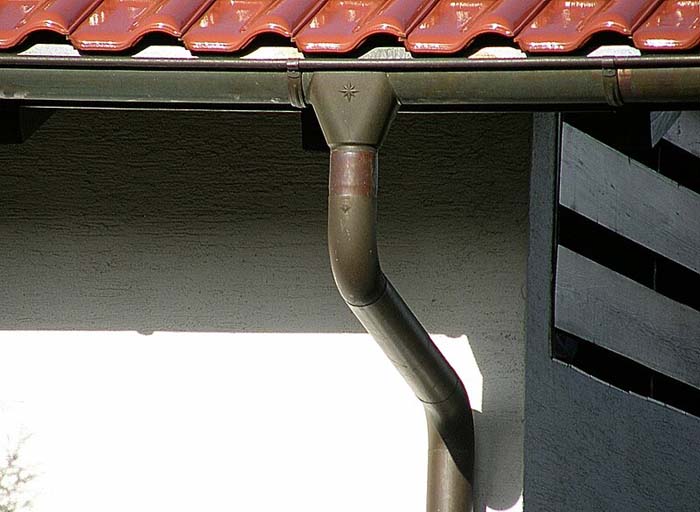
  1. Use downspouts and gutters:
  • You can further divert water runoff away from the building by using splash blocks or extensions.
  • Install downspouts so that water can flow away from buildings and their foundations.
  • Keep debris out of the gutters and make sure they’re big enough to handle heavy rain.
  1. Construct retaining walls:
  • To avoid pressure buildup, incorporate drainage pipes or weep holes into the wall design.
  • Water flow control and slope management are two areas where retaining walls shine.
  1. Create bio-swales or rain gardens:
  • To increase groundwater recharge and decrease water flow, install rain gardens.
  • Permeable soil and native plants work together to absorb and filter water runoff in well-designed settings.
  1. Install permeable surfaces:
  • Use permeable gravel or pavers instead of concrete or other impermeable surfaces.
  • They reduce water runoff by allowing it to soak into the soil.
  1. Channel runoff towards areas with natural drainage:
  • To prevent downstream floods, make sure any redirection complies with local regulations.
  • When possible, use natural drainage places, such as drainage ditches or streams, to redirect rainwater.
  1. Regular inspection and maintenance:
  • Maintaining good water control necessitates quick attention to landscaping and erosion issues.
  • To prevent blockages, keep the catch basins, drains, and gutters clean.
  • Regularly inspect and maintain all drainage systems to ensure their good working order.

How do I stop runoff in my sloped yard?

Landscaping techniques, soil stabilization, and drainage management are all part of the solution to water runoff in a sloped yard. These methods work together to reduce erosion and control the flow of water. To prevent water runoff down a sloping yard, use these methods:

  1. Manage hard surfaces.
  • Gravel and Gravel

Using these materials, you can make a surface that is both stable and permeable.

  • Permeable Surfaces

If you want water to soak through rather than flow off your driveway or walkway, use permeable materials.

  1. Soil Quality Improvement
  • Cover Crops

To stop soil erosion, plant vegetation, such as ground coverings.

  • Organic Matter

To enhance the soil’s structure and its capacity to absorb water, incorporate organic resources such as compost.

  1. Construct retaining walls.
  • Materials

For the walls, you may use timber, concrete, or stone. Just make sure there’s enough drainage behind them so the pressure doesn’t build up.

  • Retaining Walls

Maintaining the slope and minimizing erosion can be achieved by constructing retaining walls at key points. These walls redirect water flow and establish stable areas.

How to Redirect Heavy Water Runoff

  1. Use ground covers and mulch.
  • Ground Covers

Sedum, creeping thyme, and clover are dense, low-growing plants that can stabilize soil and soak up excess water.

  • Mulch

The use of mulch in the yard has dual purposes: absorbing rainwater and reducing erosion. Combine mulch with organic materials like bark, straw, or wood chips.

  1. Plant shrubs and trees.
  • Strategic Placement

Plants placed along the slope can act as natural buffers, preventing water runoff.

  • Deep Roots

Soil stabilization and reduced water runoff are achievable by planting deep-rooted shrubs and trees. Shade from trees also helps keep the soil from drying out.

  1. Create terraces and contours.
  • Swales

These ditches are grassy and shallow; they divert water away from downhill flows and toward groundwater absorption.

  • Terracing

Terraces should be built all the way up the hill. Terraces slow down water runoff by creating level parts that can collect water. Making these steps is possible with various materials, including wood, stone, or retaining walls.

  1. Install drainage systems.
  • Gutters and Downspouts

To reduce the likelihood of erosion, check that the downspouts and gutters on your house are diverting water away from any slopes.

  • Dry Wells

Dry wells are reservoirs that collect water runoff and release it gradually into the soil.

  • French Drains

Gravel surrounds a perforated pipe to form a French drain. Buried underground, it aids in channeling water to a secure location.

How to divert water runoff

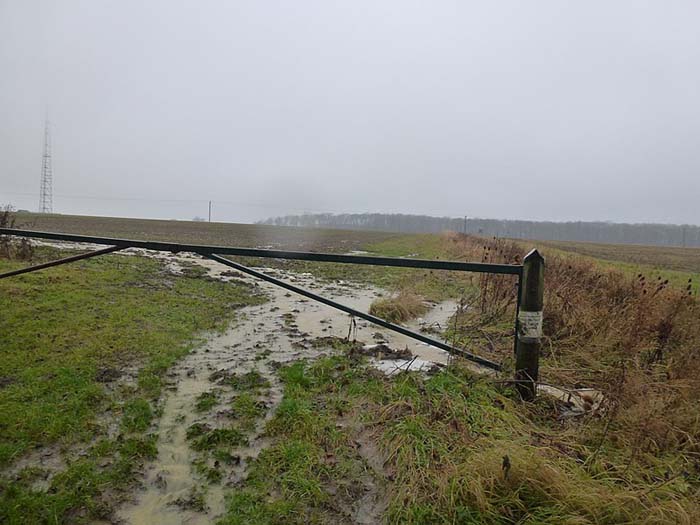
If you want to manage stormwater, stop erosion, and keep water from damaging your property, you must divert water runoff. In order to redirect water runoff, here are some efficient ways:

  1. Dry Wells
  • An underground structure known as a dry well can collect and disperse water runoff into the soil. The usual application is to divert runoff from downspouts and gutters.
  1. Planting Vegetation
  • Plants, particularly those with deep taproots, aid in water absorption and soil stabilization. This, in turn, decreases water runoff and erosion. To mitigate water runoff, plant trees, shrubs, or ground cover in low-lying regions.
  1. Swales
  • Shallow ditches direct water to a specific area, where the soil absorbs it. To improve infiltration and decrease erosion, you can landscape them with plants or grass.
  1. Pervious Paving
  • Gravel, permeable pavers, or porous concrete are examples of previous paving materials that let water soak into the ground rather than run off the surface.
  1. Downspouts and Gutters
  • Correctly placed downspouts and gutters successfully divert rainwater away from the foundation and roof. Make sure that the downspouts lead water away from your house and into a specific rain garden or drainage, at least 5 to 10 feet away.
  1. Retaining Walls
  • Retaining walls can control water runoff and soil erosion on slopes. They direct water flow to a certain area and act as soil retainers.
  1. Berms
  • In order to control or divert the water runoff, berms are constructed as elevated mounds of dirt. They control water flow and add aesthetic value to landscaping.
  1. Pipes and Culverts
  • Installing pipes and culverts under roads, pathways, or driveways can direct water to a specific drainage region.
  1. French Drains
  • A French drain is a type of filled trench that uses rock or gravel and a perforated pipe to channel water to a designated area. Their primary use is to redirect water from the surface or ground away from structures or trouble spots.
  1. Rain Gardens
  • Planted depressions called “rain gardens” absorb water runoff and let it seep into the soil. To decrease the impact of water runoff and boost biodiversity in the area, you can plant native plants in them that can withstand both dry and wet conditions.

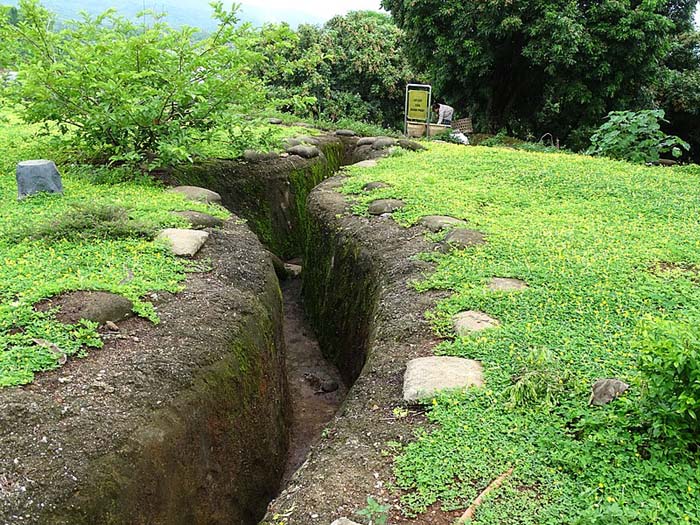
How to build a runoff drain

To control stormwater and protect your property from erosion or flooding, constructing a runoff drain is a practical project to undertake. An outline for building a runoff drain, also known as a trench drain, French drain, or simply a drain, follows. Depending on the scope of your project and the local regulations, you may need specialized permissions or expert advice.

  1. Determine where to put the drains.
  • Check Regulations

Find out whether anything is breaking the law in your area. In certain municipalities, specific drainage projects are subject to permit requirements.

  • Select a Drainage Path

Choose a destination for the water. It should ideally drain into a lower part of your property, a dry well, or a storm drain where water can safely flow.

  • Locate the water source

Find the water source, whether it’s a hillside, driveway, or roof.

  1. Decide on the type of drain.
  • Trench Drain

The grated surface and underground trench collect and direct water runoff. This makes it an ideal surface for driveways and other hard surfaces.

  • French Drain

This process uses a gravel-filled trench and a perforated pipe that diverts water.

  1. Gather materials.
  • Tools

For the purposes of digging and installation, you need measuring tools, wheelbarrows, and shovels.

  • Filter Fabric

It helps keep gravel from clogging with dirt.

  • Gravel

Fill the ditch with coarse gravel or crushed stone.

  • Perforated Pipe

To facilitate water entry and drainage, select a pipe with holes.

  1. Dig the trench.
  • Choose the width and depth

For larger drains, you need a depth of at least 18 inches, and preferably more. Your gravel and pipe will determine the width.

  • Ensure a slope

If the trench slopes gently, roughly 1 to 2 inches every ten feet, the water will naturally flow toward the exit point.

  1. Drain installation.
  • Add the filter fabric

To keep dirt from getting into the pipe or gravel, line the trench with fabric.

  • Place Gravel

Spread gravel over the trench’s base.

  • Install the pipe

Set the perforated pipe so that its bottom ends point down the trench’s slope.

  • Cover the pipe

Fill the trench up to a depth of two or three inches with gravel, piling it on top of the pipe.

  • Wrap the fabric

To keep the cloth in place, fold it over the gravel.

  1. Final touches.
  • Cover with soil

Fill up the trench to ground level by adding topsoil over the fabric.

  • Add Turf or Replant

After digging a trench, replant it with grass or another ground cover if necessary.

  • Test the Drain

Pour water directly from the source if you want it to drain smoothly.

Tips for success

  • Expert Help

It may be wise to retain the services of an expert landscaper or engineer when dealing with extensive projects or intricate drainage systems.

  • Maintenance

In order to keep the drain working properly, you should check it often and remove any debris.

  • Take erosion control into account

To further reduce the likelihood of erosion, use retaining walls or landscaping in low-lying regions.

Conclusion

Although water runoff is an essential part of the water cycle, it can have harmful effects on both humans and the environment if not managed properly. Controlling runoff and promoting sustainable water practices is achievable through techniques such as good stormwater management and green infrastructure.

How to Fix a Swampy Area in My Backyard

How to Fix a Swampy Area in My Backyard

By | Drainage Systems | No Comments

When water collects in one spot and doesn’t drain away, whether because of natural wetland features, low elevation, or poor drainage, you have a swampy area in your backyard. Homeowners in such an area may face new difficulties and possibilities.

Characteristics of a Swampy Area in My Backyard:

Lots of organic matter, a high water table, or poor drainage are some of the causes that can lead to a swampy area in your backyard. These are some telltale signs of a swamp:

  • Stagnant smell

Because organic waste decomposes slowly in a swampy area where there is little water flow, the air in these locations can take on a distinct stagnant or musty smell.

  • Wildlife presence

Because of the natural habitat preferences of many animals, you may see more of some species in a swampy area, such as birds, turtles, and frogs.

  • Presence of Standing Water

Standing water or puddles that are easy to observe may indicate low-lying areas or poor drainage.

  • Decreased plant diversity

There is typically a distinct ecosystem in swampy regions, with fewer plant species able to thrive in the consistently high humidity.

  • Soft or spongy soil

The area has a high moisture content if the ground is spongy or mushy when you walk on it, it has a high moisture content.

  • Mosquito breeding grounds

Insects and mosquitoes thrive in stagnant water, which is why you could find more of them in a swampy area.

  • Lots of water-loving plants

Rushes, cattails, reeds, and other plants that thrive in swamps are common. Even in very wet environments, these plants manage to flourish.

  • Algae and moss growth

Because it is always wet, you may see more algae or moss growing on the soil or other surfaces.

  • Increased erosion

Erosion is more likely to occur in the soggy, wet soil, altering the landscape over time.

  • Waterlogged and wet ground

The continuously waterlogged or wet soil is the most striking feature. Some locations may have water pooling or remain waterlogged for long periods of time.

Here’s how to fix a swampy area in my backyard.

Soil structure, accumulation of water, and drainage are the three main issues that you should address to fix a swampy area in your backyard. To rescue your backyard from its current swampy condition, follow these steps:

  1. Create a rain garden

Set up this feature in an area where water collects by itself. The purpose of this garden is to collect and purify rainwater. Add some plants that do well in damp environments, and think about building a little retaining wall to keep it contained.

  1. Identifying the cause

Locate the swampy area’s source and investigate it. High water tables, soil compaction, poor drainage, and incorrect grading are common culprits. Watching the water patterns after watering or during rainstorms can help you find the source.

How to Fix a Swampy Area in My Backyard

  1. Adjust the soil structure
  • Incorporate organic matter while aerating

Soil compaction can cause drainage problems. Aerating the area and adding organic materials like peat moss or compost can improve the soil’s structure and its ability to absorb water.

  • Use gravel or sand

If the soil remains too wet, add gravel or sand to increase drainage.

  1. Regrading and Redirecting Water

Make sure your yard is well-sloped, meaning that it gently slopes as it moves away from high-traffic areas and structures.

  • Create Swales

With swales or shallow ditches, you can direct water to more appropriate drainage locations or naturally occurring places with the use of swales or shallow ditches.

  1. Improve drainage
  • Surface drains:

Surface drains can help redirect small amounts of water that may pool.

  • Dry well

A dry well can collect and gradually distribute water if you have an area to channel overflow.

  • French drain

This entails excavating a gravel-filled trench and installing a perforated pipe to divert water away from the swampy area. Ensure that it slopes in the direction of an appropriate drainage outlet.

  1. Consult an expert

If the problem is significant, you should consult a drainage or landscaping professional. Based on their evaluation, they can advise you on what to do next.

  1. Plant water-resistant vegetation

You can prevent soil erosion by planting water-tolerant or native plants, which can absorb excess water. Rushes, sedges, ferns, and even some kinds of grasses are on the table.

  1. Install berms or retaining walls

In a large or complicated marsh, retaining walls or berms may be necessary to control or reroute water. For bigger jobs, it’s best to have a professional’s opinion, such as in landscaping or drainage.

If you have a swampy area in your backyard, you can make it more usable and beautiful by following these methods to cure it.

The challenges of having a swampy area in your backyard

Many problems might arise for homeowners when there’s a swampy area in their backyards. Some typical problems and possible answers are as follows:

  • Property damage

Persistent wet conditions can cause damage to outdoor structures or foundations. Proper drainage, together with routine repairs and inspections, can reduce the likelihood of this happening.

  • Poor plant growth

When the soil becomes too wet, many plants die. To enhance root conditions, build raised garden beds or grow water-tolerant plants such as ferns, iris, or cattails.

  • Soil instability and erosion

Soil that is too wet increases the risk of erosion and makes the surface unstable. Soil stabilization and erosion prevention are possible with the use of retaining walls, ground cover plants and mulch.

  • Mosquito and pest infestation

Mosquitoes, which can spread disease, thrive in stagnant water. You can help control the number by erecting bat houses, using larvicides, or growing plants that repel mosquitoes, such as marigolds or citronella.

  • Maintenance difficulty

The constant presence of water makes it difficult to mow and otherwise maintain a swampy area in your backyard. You have the option to use a wet area-specific hover mower or construct boardwalks or elevated paths.

  • Decreased usable space

The swampy area may limit landscaping options and outdoor activities. One way to make use of a swampy area is to build patios or decks on top of it.

  • Water accumulation

Standing pools, which serve as breeding grounds for mosquitos and other insects, form when there is an excess of water. A grading of the yard to redirect water away from the home, or the installation of French drains or other suitable drainage systems, can be solutions.

To address these issues, people typically combine vegetation management, building, and landscaping.

Conclusion

For a safe, practical, and aesthetically beautiful outcome in a swampy area in your backyard, it’s necessary to weigh the advantages and disadvantages of the situation. Creating designated wetland areas, constructing raised garden beds, or improving drainage are all potential solutions that might work with the existing environment.

10 DIY Yard Drainage Methods

10 DIY Yard Drainage Methods

By | Drainage Systems | No Comments

Managing and redirecting water to avoid water damage, erosion, and flooding can be an overwhelming undertaking for any homeowner without knowledge of DIY yard drainage methods. In order to help you deal with typical yard issues, this guide gives an introduction to basic draining procedures.

Here are some DIY yard drainage methods to consider:

If you don’t properly maintain your yard drainage, water can accumulate and cause damage to your home.

  • Downspouts and Gutters

Keep the downspouts clear, and make sure the gutters are clear so water doesn’t pool around the foundation. To further direct water flow, you can use splash blocks or downspout extensions.

  • Rain Barrels

These divert water away from the yard by collecting it from downspouts and gutters. You can use the collected water for gardening or any other purpose.

  • Dry Well

After accumulating in a dry well, water slowly absorbs into the earth. To help disperse the water, you drill a hole and fill it with gravel.

  • Trench Drain

One way to collect runoff is with a trench drain, which is essentially a long, narrow grate. Patios, driveways, and other areas prone to high water pressure are ideal locations for its installation.

  • Swales

A swale is a grassy, shallow waterway that directs water to a specific location. You can use it to redirect overflow from a garden or yard.

  • Catch Basins

To collect and channel runoff, set up these small grates in the yard. They can channel the water to an existing drainage system or link to one.

  • Rain Garden

Because of its design, this garden can soak up rainwater and let it seep into the ground over time. You can place plants that thrive in damp environments inside to soak up any surplus moisture.

  • Permeable Pavers

To lessen the impact of runoff, use permeable pavers instead of asphalt or solid concrete surfaces.

  • Slope Correction

To redirect water away from trouble spots, you can alter the terrain so that it gently slopes.

  • French Drain

To do this, dig a trench, lay a perforated pipe, and use gravel to cover the trench. It redirects water away from the problematic area and toward a better one, such as your yard’s lower part or a drain.

10 DIY Yard Drainage Methods

Identifying drainage issues

Mold growth, foundation problems, and water damage are just a few of the concerns that can accrue from poor drainage in both commercial and residential structures. The following guide helps identify and understand drainage problems:

Signs of Drainage Problems

  • Uneven Walkways or Driveways

Walkways and driveways that settle or shift may indicate soil instability due to poor drainage.

  • Erosion

In low-lying places, you can see roots that are sticking out, bare spots, or sediment that has accumulated, all of which indicate soil erosion.

  • Soggy Lawn or Garden

If water pools in some areas of the garden or lawn for several days after rain, the drainage may be insufficient.

  • Gutters Overflowing

If your gutters are clogged or don’t have enough room to hold water, it could mean that your drainage system isn’t working properly.

  • Issue with the Foundation

If you see diagonal or horizontal cracks in your basement walls or foundation, it could be a sign of water pressure from poor drainage.

  • Water Stains

Look for signs of water damage, such as stains on the floors, ceilings, and walls that might indicate water seepage.

  • Water Pooling

Water collecting in one area is a clear indication of drainage issues, such as in the basement, the area around the foundation, or the yard.

  • Mold and Basement Dampness

Musty smells, mold growth, or persistent dampness in the basement are common signs of water infiltration.

Reasons for Drainage Problems

Downspouts Near the Foundation

Water seepage can occur when downspouts empty their contents too close to the foundation.

Incorrectly Installed Drainage Systems

When not set up properly, drainage systems like French drains can’t properly channel water away.

Clogged Downspouts or Gutters

If debris blocks the downspouts and gutters, water may overflow and pool near the foundation.

Overwatering

Watering your garden and lawn too much may cause drainage and saturation problems.

Incorrect Grading

If the land slopes in a certain direction, direct the water away from the foundation. Improper grading can be the cause of the water accumulation.

How to deal with drainage problems

  • Improve Drainage Using Landscaping

To redirect water runoff, use rain gardens or swales.

  • Adjust Grading

For every ten feet, there should be a 6-inch drop in elevation away from the foundation.

  • Waterproof Basement Walls

Cover your basement walls with a waterproof coating to prevent water from seeping in.

  • Prolong Downspouts

Make sure the downspouts are at least six feet long to divert water away from the foundation.

  • Hire an Expert

If the problem persists or worsens, contact a structural engineer or drainage specialist.

  •  Clean Downspouts and Gutters

To keep water flowing properly, clean and maintain the downspouts and gutters on a regular basis.

  • Install French Drains or Other Drainage Systems

If the problem of water pooling persists, more drainage systems may be required.

Implementing Your DIY Drainage Solution

Here are the main things to keep in mind when considering DIY yard drainage methods:

  • Installation and maintenance

For a well-designed and operational drainage system, it is important to adhere to installation best practices. If you want your drainage system to last and work properly, you need to maintain it regularly.

  • Gather materials and tools

Collect all the necessary tools to execute the chosen drainage plan. Equipment such as landscaping fabric, perforated pipes, shovels, gravel, and trenches are common.

  • Have a plan for your drainage

After deciding where the water should go, select the best drainage method. Make sure to factor in any required local regulations or licenses while making plans.

  • Inspect the soil type and slope

Grade your yard properly so that it slopes away from your home. Take a look at your yard’s soil drainage to see what works best.

Make Your Yard Drain Faster

You can prevent erosion, waterlogging, and other problems by enhancing the yard’s drainage system. Some ways to speed up your yard’s draining are as follows:

  1. Use permeable pavers
  • Think about replacing your patios and driveway pavers with some permeable ones. These allow water to seep through, reducing runoff.
  1. Soil aeration and amendment
  • In order to boost the soil’s ability to absorb water, aerate it. Add organic materials, such as compost, to soils with a high clay content. This will help to improve drainage and permeability.
  1. Regrading the yard
  • Reshape or regrade the yard to ensure that water drains away from your home and other buildings. Instead of running off problematic areas, direct the water onto drainage systems with a gentle slope.
  1. Install a rain garden or a dry well
  • A dry well is an underground structure that gathers water from overflow and lets it seep into the soil. Planting a rain garden aims to absorb and filter runoff.
  1. Install a French drain
  • You can redirect surface and underground water using a French drain. A gravel- or rock-filled trench connects to a perforated pipe in these drains. Put it in place in low regions to redirect water to a better spot.
  1. Use drainage pipes and grates.
  • In places where water gathers, set up drainpipes or grates to channel the water to an appropriate drainage outlet, such as a dry well or storm drain.
  1. Plant it correctly
  • Plant grasses and shrubs with deep roots to aid drainage. Go around plants that love damp soil. Improving water absorption and preventing soil erosion are two benefits of planting correctly.
  1. Consider professional help
  • A drainage professional or landscape architect can help you come up with a unique plan to fix complex or severe drainage issues.
  1. Evaluate the yard’s drainage issues
  • Find out whether there is a problem with the drainage and where water is pooling. Be on the lookout for low spots, slopes, and areas with heavily clayed or compacted soil.
  1. Create berms and swales
  • Swales, or shallow ditches that resemble troughs, direct water to drainage areas. In order to channel water, berms are elevated mounds. Both have the ability to control the flow of water and improve drainage.

With these DIY yard drainage methods, you can fix drainage problems in your yard and keep water from pooling there.

Conclusion

Every approach has its own set of advantages and suits specific situations. Your choice will depend on the severity of your drainage problem, your financial resources, and the layout of your yard. Get some expert assistance from someone who knows about drainage and landscaping if you aren’t sure what to do.

How to Install an In-Ground Drainage System

How to Install an In-Ground Drainage System

By | Drainage Systems | No Comments

Any type of building, from industrial to commercial to homes, can benefit from an in-ground drainage system for managing runoff. The main goal is to keep water from pooling, which can lead to soil erosion, flooding, and other problems. A public stormwater system or a designated drainage area will be the final destination for excess water accumulating around roads, buildings, and other infrastructure.

Key Components

  • Sump pumps

Sump pumps actively transfer the water to a designated drainage point when gravity alone cannot adequately drain a low-lying area.

  • Culverts and pipes

These underground pipes transport runoff from catch basins to a stormwater system or a designated outlet.

  • Drainage swales

The purpose of these shallow channels is to direct surface runoff into a specified drainage area.

  • French drains

This is an in-ground drainage system that uses gravel to surround perforated pipes. It diverts water away from critical areas, allowing it to seep into the earth.

  • Grates and catch basins

Water can enter the drainage system through these openings. Catch basins, typically located in low areas to collect excess water, benefit from the presence of grates to prevent trash from entering them.

Here’s how to install an in-ground drainage system.

To protect your home or outbuilding from flooding and other water damage, consider installing an in-ground drainage system. The procedure for laying an in-ground drainage system is as follows:

Step One: Create a drainage system plan.

  • Identify water and low spots

Find the areas that collect water, as well as the ones where you want it to go away. When planning how to direct the flow of water, keep in mind the inherent slope of your property.

  • Pick Out Drainage Components

Dry wells, catch basins, and French drains are the most popular drainage systems. Dry wells aid in dispersing water into the soil; catch basins collect water at distinct locations; and French drains are ideal for expansive areas where water consistently pools.

Step Two: Get utility locations and important permits

  • Utility Locates

Before digging, contact your local utility company to see if any underground utilities are available. This critical step is required to ensure safety and prevent harm.

  • Permits

Installing drainage systems, particularly those connecting to public sewers, may require permits in certain areas. To find out, contact the appropriate authorities in your area.

Step Three: Gather tools and materials.

  • Tools

A pipe-cutting saw, wheelbarrow, level, shovel, tamper, tape measure, and spade.

  • Materials

Sod, end caps, gravel, perforated pipe, soil, drainage catch basins, and geotextile fabric are all potential covering options.

Step Four: Dig and install the drainage system

  • Digging

Follow the planned path to excavate trenches. While the exact dimensions of the trench depend on the chosen drainage system, a standard depth of 18 to 24 inches is often ideal for French drains. To make sure water flows properly, the trench should have a slope of approximately 1 inch for every ten feet.

  • Perforated pipe installation

Layer four to six inches of gravel on top of the geotextile fabric in the trench. Before placing it on top, ensure that the pipe’s perforations point out to the sides or downward. As required, connect pipe sections.

  • Add geotextile fabric and gravel

Fill the pipe with more gravel until it is a few inches below ground level. Wrap the geotextile material around the gravel to keep dirt from getting into the system.

  • Cover and compact

To prevent the trench from sinking again, fill it with sod or soil and compact it.

Step Five: Connect to a basin or outlet.

  • Drainage outlet

If necessary, connect the drainage system to an existing outlet, such as a storm drain. If you’re using a catch, cover it with a grate and install it correctly.

  • Test for functionality

Pour water through the system before covering it completely to ensure there are no leaks or obstructions.

Step Six: Backfill and restore the landscape.

  • Backfill

Backfill the trench with sod or soil once you install and test the drainage system.

  • Restore landscape

Repair damaged areas and replant grass or other vegetation to restore the landscape.

Factors to consider when installing an in-ground drainage system.

Maintenance

Regular inspections and maintenance are necessary to keep the system functioning properly.

Expert Installation Services

Expert installation is essential for in-ground drainage systems to work as intended and meet all applicable codes.

Regulations and permits

Before installation, check the local regulations and get any necessary permits.

Site Assessment

Only a thorough site study can determine the optimal drainage system.

Common In-Ground Drainage System Types

  • Catch Basins

They collect runoff from the ground and channel it into a storm sewer or drainage system.

  • Dry Wells

Buried beneath the surface are these structures. They collect rainwater and release it into the soil, allowing it to seep into the earth over time.

  • Channel Drains

The trench is long, narrow, and covered with a grate. Roads, parking lots, and driveways widely use it to manage surface runoff.

  • Sump Pump Systems

It is intended to prevent flooding in crawl spaces and basements by removing excess water.

  • French Drains:

It features a perforated pipe and a trench filled with rock or gravel. In flood-prone areas, they help to divert groundwater and surface water.

The benefits of installing an in-ground drainage system are significant.

Both commercial and residential establishments can reap the rewards of an in-ground drainage system. A comprehensive rundown of the benefits is as follows:

  • Keeps insects and other pests at bay

Standing water is a haven for mosquitoes and other unwanted guests. To reduce the impact of these problems and make the outdoors more pleasant, ensure adequate drainage.

How to Install an In-Ground Drainage System

  • Custom-made

Your property’s design and drainage requirements can help you customize an in-ground drainage system. The system’s adaptability guarantees it will cater to your needs while delivering top-notch performance.

  • Foundation protection

Directing water away from the foundation can prevent issues like structural stability, foundation cracks, and erosion. Over time, this can save a lot of money on repairs.

  • Safety Improvement

Poor drainage can make driveways, walkways, and other outdoor spaces dangerously slick. An in-ground drainage system mitigates these dangers by swiftly draining any surplus water.

  • Minimizes soil loss

Soil erosion can occur when water does not drain properly. An in-ground drainage system can stabilize the soil and keep flower beds, gardens, and lawns looking great.

  • Improved property value

A properly planned drainage system can raise your home’s resale value. Because it reduces the likelihood of water-related problems, prospective buyers are more inclined to value a house with good drainage.

  • Increases usable space:

If your property floods, you may not be able to use all of it. Thanks to an in-ground drainage system, you can enjoy your outdoor area to the fullest without ever having to worry about flooding or soggy ground.

  • Floods prevention

Install an in-ground drainage system to keep your property dry during storms and severe rains. This will reduce the damage to landscapes, buildings, and other structures.

  • Landscape health improvement

Water pooling in specific areas can result in mold and mildew growth, plant destruction, and soil erosion. An in-ground drainage system is an asset to healthy landscaping, preventing oversaturation and directing water where it’s required.

Applications

There are several distinct contexts in which an in-ground drainage system is useful:

  • Infrastructure in urban areas

To keep the city’s drainage system in good working order and avoid street floods,

  • Industrial and commercial areas

The goal is to reduce the likelihood of floods and property damage by controlling rainwater runoff from big surfaces such as roofs, parking lots, and rivers.

  • Recreational areas and sports fields

This is necessary to ensure that the fields remain playable and the turf remains undamaged by water.

  • Agricultural fields

In order to avoid water collection that could harm crops or stunt their growth, it is important to irrigate properly.

  • Residential properties

It is important to manage rainwater runoff from gardens, driveways, and roofs to prevent waterlogging, soil erosion, and basement flooding.

Additional Tips

  • Use thicker, tougher pipes to avoid potential damage due to large trees or heavy machinery.
  • To make maintenance and cleaning easier, think about installing inspection ports into the drainage system.

Conclusion

An in-ground drainage system is necessary to control water runoff, avoid flooding, and stop erosion. These systems are critical for preserving property and environmental health, and they have many useful applications. They work and last longer with careful planning, installation, and maintenance.

How to Install a Downspout Drain Box in My Yard

How to Install a Downspout Drain Box in My Yard

By | Drainage Systems | No Comments

An integral part of many drainage systems, particularly those in commercial and residential areas, is a downspout drain box. People also refer to it as a stormwater drain box or catch basin. It serves the important function of diverting water away from buildings. This will reduce the likelihood of flooding and erosion, as well as manage stormwater runoff and rainwater.

What is a Downspout Drain Box?

A downspout drain box is a storage device that collects water from a downspout. It is a vertical pipe that carries rainwater from a roof’s gutter system. The box is typically made of concrete, plastic, or another durable material. People usually place a cover or grate on top of the drain box to allow water to flow in while keeping out garbage, twigs, and leaves.

Functionality

A downspout drain box’s principal function is to collect runoff and channel it into a stormwater system or another specified drainage area via channels and pipes. During rains, helping to manage overflow reduces the likelihood of water damage to landscaping and buildings.

One effective strategy for controlling the flow of rainfall away from your home and away from erosion and flooding is to set up a downspout drain box. Here is a detailed tutorial on how to set one up:

Materials Needed

  • Downspout drain box with a lid
  • Work gloves
  • Fittings and pipe connectors
  • Garden spade or trowel
  • Tape measure
  • Crushed stone and gravel
  • Level
  • PVC glue
  • Corrugated or PVC drainage pipe
  • Shovel

How to Set Up a Downspout Drain Box Correctly

  • Pick out the location

Pick out the location where you want to install the downspout drain box. You should connect it to a drainage system that leads away from your house’s foundation and is located near the downspout’s base.

  • Dig a hole for the drain box

Dig a hole big enough to accommodate the downspout drain box with a shovel. To allow water to drain properly, the box should be either slightly elevated or level with the ground. The hole must also be deeper than the box’s height for a gravel base to fit.

  • Add gravel base

To make a stable base, fill the hole with crushed stone or gravel about a couple of inches deep. This improves both the drainage and the box’s stability.

  • Place the drain box

Before inserting the downspout drain box into the hole, level it with a level. Adjust the gravel base as necessary to ensure the box is level.

  • Connecting to downspout

Attach the downspout to the drain’s base. After trimming it to size, a fitting is usually used to attach the downspout to the box. If you want to make sure it stays put, use PVC adhesive.

  • Drainage pipe installation

Mapping out a drainage pipe’s ideal path away from your home will help you find a good spot where water can flow freely. Beginning at the downspout drain box, excavate a trench up to this spot. The trench should have a modest downward slope to ensure proper water flow.

  • Place the drainage pipe

After laying it in the trench, attach the drain box’s fittings to the corrugated or PVC drainage pipe. If necessary, use pipe elbows for turns. Use PVC glue to secure the connections and stop any leaks.

  • Backfill the trench

Once you’ve set up and fastened the pipe, carefully pack the dirt you dug out of the trench back into it. This will ensure that the pipe remains securely in place and does not settle with time.

  • Cover the drain box

Secure the drain box’s lid in place. Ensure the grate on your downspout drain box is clear of debris.

  • Test the system

Run water via the downspout to check that the system is working correctly and that the water is leaving the home.

If you follow these steps, you should have no trouble installing your downspout drain box. This will help manage water runoff and prevent damage to your foundation and yard.

Benefits of the Downspout Drain Box

A downspout drain box is a wise investment for efficiently handling water running off of downspouts and gutters. A downspout drain box has several important uses, including the following:

How to Install a Downspout Drain Box in My Yard

  • Prevents damage to walkways and driveways

By managing the water flow, hard surfaces like walkways and driveways can be protected against water damage, such as erosion and cracks.

  • Decreases flooding and improves drainage

It helps manage large volumes of rainwater, reducing the likelihood of localized floods in your yard. This may be especially important in areas with poor drainage or during periods of intense rainfall.

  • Enhances visual appeal

From the many options available, you can choose a downspout drain box that matches the style of your home’s exterior. Doing so can help improve the curb appeal of the area immediately surrounding your home’s foundation.

  • Protects landscaping

If you want to keep water from washing away or flooding your landscape features, such as a garden or lawn, you should direct it to a drain or another safe exit.

  • Decreases areas ideal for mosquito breeding

If you want to keep mosquitoes at bay in your yard, one thing you can do is get rid of any standing water near your house.

  • Low maintenance

Usually, a downspout drain box requires little maintenance other than the occasional cleaning to keep it clear of debris and unclogged. This easy maintenance guarantees its continued effectiveness.

  • Reduces the risk of basement flooding

It helps reduce the likelihood of basement flooding—a prevalent issue in many houses—by diverting water away from the foundation.

  • Protects against water damage and erosion

Your home’s exterior from erosion and water damage from pooling near the foundation with the installation of a downspout drain box. This box gathers water from downspouts and channels it into a drainage system or away from the foundation.

Maintenance and care of a downspout drain box

If you want to keep water from running down your roof, a downspout drain box is a must-have. It requires constant attention and care to keep working correctly. The most important things to remember when caring for a downspout drain box are:

  1. Add protective measures
  • Splash Blocks

Installing splash blocks will prevent soil erosion and keep water away from the foundation.

  • Rocks and gravel

To improve water drainage and decrease erosion, surround the drain box with a layer of rocks or gravel.

  • Leaf guards

To cut down on debris buildup, consider putting screens or leaf guards over your downspouts.

  1. Cleaning
  • Flushing

To prevent a clog, flush the box and any connected pipes with water. A yard hose will do the trick.

  • Removing Debris

Remove any buildup of debris, dirt, or leaves from the area surrounding the downspout drain box. To remove the debris, use a garden trowel or anything similar.

  1. Component repair and replacement
  • Repositioning

To keep water away from your foundation, make sure you position the downspout drain box correctly.

  • Replace damaged parts

It may be necessary to replace the downspout drain box or pipes if they have sustained substantial damage.

  • Repair cracks

Apply waterproof sealant to the small holes in the box to stop water from seeping out.

  1. Addressing Clogs
  • Cleaning drain pipes:

You might have to use a longer tool or call a plumber if you think there’s a clog in the connected drain pipes.

  • Unclogging:

If water collects around the downspout, a clog may exist. To remove the clog, use a plumber’s snake or an equivalent instrument.

  1. Get help from professionals

It is best that you install splash blocks to prevent soil erosion and restrict water from reaching the foundation.

  • Routine maintenance

With some companies’ maintenance services, you can keep drain boxes and downspouts in good shape all year with the help of some companies’ maintenance services.

  • Consultation

If you encounter complex problems or are unsure about any part of the maintenance, consult a drainage specialist or a professional plumber.

  1. Inspecting regularly
  • Inspecting Damage

Inspect the box and its connections for indications of wear and tear, such as pipe misalignment, rust, and cracks.

  • Regular Inspections

Check the downspout drain box twice a year, preferably in the spring and fall. This becomes even more important following storms or periods of heavy rainfall.

Follow these measures to keep your downspout drain box in good working order and extend its life. This will ensure that water drains properly and prevent water damage to your property.

Conclusion

An effective system for managing stormwater must have a downspout drain box to prevent erosion, floods, and water damage. When installed and maintained correctly, landscapes and buildings benefit greatly from their installation and maintenance when done correctly.

Best Drainage Techniques for Sloped Backyards

Best Drainage Techniques for Sloped Backyards

By | Drainage Systems | No Comments

To prevent damage to structures or landscaping, flooding, and erosion due to water, it is essential to implement drainage techniques for a sloped backyard. To keep a backyard and garden healthy and safe from water damage, it is important to have a drainage system that effectively channels water away from important locations. For sloped backyards, proper drainage is of the utmost importance. This will help prevent structural damage, standing water, and erosion.

Here are several effective drainage techniques for a sloped backyard:

  1. Swales

These drainage techniques involve shallow ditches purposefully dug to collect and reroute water. They can blend in with the environment and direct runoff to a dry well or storm drain. Adding vegetation to swales aids in water absorption and decreases its flow.

Using swales has the following important advantages:

  • Climate Resilience

Swales can reduce the severity of flooding and heavy rainfall, making communities more resilient to the more frequent extreme weather events brought on by climate change.

  • Controlling Erosion

Swales help reduce soil erosion by decreasing water flow and collecting runoff. For places with loose soil and steep slopes, this is a lifesaver.

  • Conserving Water

The requirement for irrigation reduces the use of swales to collect and infiltrate rainwater. This is very helpful in areas where water is scarce or drought is common.

  • Improve Soil

Using swales, you can improve soil structure and fertility. These drainage techniques improve the soil quality in their immediate vicinity by absorbing sediments and organic matter in addition to water.

  • Decreased Stormwater Pollution

They can serve as biofilters, capturing sediment and contaminants in runoff before they enter waterways and helping to mitigate water pollution.

  • Water Management

Reduced runoff and increased groundwater recharge are two benefits of using swales to collect and reroute rainwater. This has the potential to decrease the burden on man-made drainage systems and save lives by avoiding floods.

  1. Downspouts and Gutters

Make sure your home’s gutters and drains face away from any slopes and are free of debris. Water can erode the slope, leading to drainage issues. This helps to avoid those problems.

Downspouts and gutters have the following advantages:

  • Reducing Basement Flooding

Installing downspouts and gutters can mitigate basement flooding. These drainage techniques divert water away from the structure. If water pools around the foundation, it will eventually leak into the crawl space or basement. This causes mildew and other issues.

  • Preventing Soil Erosion:

Downspouts and gutters reduce soil erosion by channeling runoff into a designated location. This stops the earth from settling unevenly, which is crucial for landscaped areas.

  • Protecting the Foundation

To reduce the likelihood of water damage to the building’s foundation, downspouts and gutters direct rainwater away from the structure. In their absence, water might collect at the building’s base. This eventually leads to structural problems, cracks, and erosion.

  1. Dry Creek Beds

These drainage techniques direct water flow into the garden. They are decorative and functional, featuring plants and stones to make them more aesthetically pleasing and prevent erosion. This technique can be designed with your yard’s natural slope in mind.

Beneficial features of dry creek beds include the following:

  • Decreased Water Use

Dry creek beds are an eco-friendly alternative to traditional water features. This is due to the fact that they don’t require frequent replenishment.

  • Enhanced Drainage

You can use them to control the flow of water in the yard, making sure it doesn’t damage your house, patios, or anything else valuable. As a result, water is less likely to pool and cause harm.

  • Controlling Erosion

Stormwater runoff can be better managed with dry creek beds, which in turn reduces soil erosion. To avoid damaging the soil and washing it away, they direct the overflow of water to certain regions.

  1. Rain Gardens

Rain gardens can collect and absorb runoff. Soil amendments and native plants assist water infiltration, which naturally reduces the risk of erosion and standing water.

Important benefits of rain gardens include:

  • Cost Savings

Rain gardens can help keep stormwater infrastructure and maintenance costs down by reducing runoff. Additionally, they are useful in reducing the likelihood of flood damage, which can save money on insurance.

Best Drainage Techniques for Sloped Backyards

  • Groundwater Recharge

Rain gardens help the natural hydrological cycle by recharging aquifers and promoting infiltration, which recharges groundwater.

  • Improvement of Water Quality

Rain gardens help keep local water sources clean by letting runoff seep into the earth and plant life. Here, it can be naturally filtered for pollutants, including nutrients, heavy metals, and sediment.

  • Stormwater Management

A rain garden’s dual purpose is to gather rainwater and slow it down so that it can seep into the soil. Because of this, less stormwater flows into waterways and sewers, reducing the likelihood of erosion and flooding.

  1. Retaining Walls

Because they level off uneven terrain, retaining walls are useful for managing water flow and preventing erosion. You build them up with drainage pipes or weep holes to stabilize the slope and let water flow through.

Listed below are a few major benefits:

  • Support for Structures

These drainage techniques can be used on sloped land to support buildings, driveways, or roads, helping to ensure their security and stability.

  • Improved Drainage

Retaining walls can be engineered with drainage systems that divert water away from buildings and other vulnerable places to reduce the likelihood of flood damage.

  • Avoiding Floods

Retaining walls stabilize the soil and can minimize the likelihood of flooding in low-lying or heavily rain-prone areas. They can also guide the flow of water and reduce surface runoff.

  • Controlling Erosion

Retaining walls can mitigate soil erosion. These drainage techniques stop soil from shifting or washing away in the event of strong winds or rain. They really shine on slopes or in otherwise erosion-prone locations.

  1. Underground Drainage Systems

Underground pipes are the main component of these systems. They help divert water away from the backyard. You can attach them to downspouts or any other drainage feature to ensure water travels to a safe location.

Here are some of the advantages:

  • Decreased Soil Degradation and Erosion:

Proper drainage is essential to keeping buildings, roads, and other infrastructure intact. If not addressed, water can erode soil and destabilize land construction.

  • Environmental Protection

Underground drainage systems reduce the likelihood of water pollution. They direct stormwater to designated treatment facilities or outlets. This helps keep aquatic habitats healthy and decreases pollution in the environment.

  • Better Health for the Public

An effective drainage system will keep water from sitting still. This reduces the likelihood of mosquito and other insect breeding grounds and waterborne illness outbreaks.

  • Effective Wastewater Management

These systems effectively collect and transport wastewater to treatment plants. This helps to maintain adequate sanitation and prevent pollution of local water sources.

  • Decreased Flooding Risk

Underground drainage systems can reduce flooding during storms and severe rains. These drainage techniques help to manage both wastewater and stormwater. By efficiently diverting runoff from cities, they reduce flooding and other water damage.

  1. French Drains

This technique consists of a rock- or gravel-filled ditch that houses a perforated pipe. This aids in diverting water away from specific locations. Because it effectively collects and redirects water, it is ideal for sloped backyards.

The main advantages of installing French drains are as follows:

  • Better health of the landscape

French drains encourage better plant growth by decreasing waterlogging and enhancing soil drainage. This, in turn, reduces the danger of root rot and other water-related problems.

  • Preventing Erosion

When it comes to managing runoff water, French drains can be an effective tool for decreasing soil erosion, especially on hillsides and slopes. This upholds the landscape’s integrity and stability.

  • Foundation Protection

French drains divert water away from building foundations. This minimizes the likelihood of mold growth, basement flooding, and foundation cracks due to water infiltration.

  • Water Drainage

Yards, basements, and other low-lying areas are more likely to experience flooding. As a result, installing French drains can help divert water away from these locations. This improves the protection of landscapes and structures against water damage.

  1. Terracing

Terracing is the process of creating levels or a series of steps on a slope. It creates level planting spaces and slows down water flow. Install proper drainage on each terrace to avoid pooling.

The following are the main benefits of terracing:

  • Benefits to the Environment

Terracing aids in ecosystem preservation and water quality control by reducing the rate of soil erosion and increasing the capacity to regulate water flow.

  • Improved Water Retention

Flat areas created by terraces can hold water, which then seeps into the soil. As a result, less watering is required, and water retention improves.

  • Decreased Flooding

Landscaping directs water to soak into the ground rather than rush into lower areas, reducing the likelihood of flooding.

  • Greater Harvest Success

Produce yields are often higher for crops grown on terraces. This is because terracing helps to reduce erosion and improve water retention. In areas where arable land is scarce, this is particularly helpful.

  • Controlling Erosion

Terracing helps lessen soil erosion by reducing water runoff. Thanks to the stepped design, water can seep into the ground and avoid washing away topsoil, slowing it down as it travels down the slope.

Conclusion

Before settling on a method, consider your backyard’s slope and size, the soil’s composition, and your available funds. Effective drainage may require a combination of many drainage techniques. For the best outcomes tailored to your unique circumstances, seek the advice of a landscaping or drainage expert.

The Basic Principles of Underground Drainage

The Basic Principles of Underground Drainage

By | Drainage Systems | No Comments

Underground drainage helps to redirect runoff from homes, businesses, and other man-made structures to open bodies of water and treatment plants. It offers a clean and effective method of managing rainwater and waste. This makes it an essential part of city planning and modern sanitation.

Wastewater from industries, commercial buildings, and homes typically makes its way to a treatment plant via an underground drainage system. The treatment plant treats the wastewater to remove pollutants before releasing it back into the environment. There are also stormwater drainage systems to keep streets and rooftops dry and free of erosion and flooding.

Underground drainage systems necessitate meticulous engineering and planning throughout both the design and construction phases. Environmental regulations, topography, soil type, and water table are some of the factors that impact the design. Regular maintenance is critical to prevent pollution, overflows, and clogs.

Important Components of Underground Drainage

The following components make up an underground drainage system:

  • Sewage Treatment Plants

In combined sewage systems, treatment plants filter out pollutants before discharging treated stormwater and wastewater into the environment.

  • Access Points and Manholes

These entry points allow for maintenance and inspection. After an inspection, engineers can use them to clean and fix the drainage system.

  • Catch Basins

By collecting runoff and acting as a barrier for heavy material, these structures ensure that the drainage pipes remain unclogged.

  • Inlets and Storm Drains

These channels convey runoff from streets and other surfaces to the underground drainage system. Their purpose is to keep foreign objects out of the pipes.

  •  Conduits and Pipes

The majority of wastewater and water travel via these channels. Typically, we select materials such as cast iron, concrete, or PVC for their longevity and capacity to withstand corrosion.

Here are some basic principles of underground drainage.

Efficient management of rainwater, wastewater, or other surface runoff is achievable with the installation of underground drainage systems. This can occur in both residential and commercial areas. Reducing environmental impact, protecting people’s health, and avoiding floods are all priorities. The principles of underground drainage are as follows:

Pipe Sizing and Material

  • The amount of water that needs draining determines the pipe diameter. Clay, concrete, and PVC are common materials, and each has its advantages in terms of simplicity of installation, flexibility, and longevity.

Maintenance and Monitoring

  • Regular maintenance and close monitoring are essential for underground drainage systems. Preventing system failure due to leaks, clogs, and other problems is possible. This includes scheduled repairs, cleaning, and inspections.

Drainage Planning

  • An effective underground drainage system is the result of careful planning. Finding the right design, connection points, slopes, and pipe sizes is all part of this process. To be effective, the system must include future expansions, land usage, and anticipated water volumes.

Overflow Management and Drainage Capacity

  • When planning an underground drainage system, make sure it can manage high flows and severe weather. Emergency drainage routes or overflow outlets may be part of this plan to avoid floods.

Using Inspection Chambers and Manholes

Connection to Municipal Systems

  • The connection to stormwater management systems or municipal sewer systems is a common feature of underground drainage systems. To avoid pollution and incompatibility, it is necessary to follow local regulations and codes.

Condition and Support of the Soil

  • Soil conditions determine whether or not underground drainage systems will be stable. To avoid pipe collapse and guarantee lasting sturdiness, it is important to use the right bedding and support structures.

Environmental Considerations

  • Managing runoff and preventing contamination are two ways to solve environmental challenges. Sustainable drainage solutions, water source contamination prevention, and the use of environmentally friendly materials are all part of good practice.

Gravity-Driven Flow

  • Gravity typically guides the flow of water in underground drainage systems. The goal of installing pipes at an angle is to direct their flow continuously toward an outflow point, such as a drainage ditch or sewer system.

Backflow Prevention

  • Underground drainage systems aim to prevent backflow, which can result in pollution and flooding. Water can only flow in one direction, thanks to valve installations and backflow protection devices.

Underground drainage systems can be more ecologically responsible, reliable, and effective when built and maintained according to these standards.

Function and Significance of Underground Drainage

To properly manage and dispose of wastewater and stormwater, underground drainage systems are a crucial component of infrastructure. When it comes to public health, environmental preservation, and city planning, they are indispensable. Here’s their function and significance:

Function

  • Environmental Protection:

These systems protect natural water sources, like lakes and rivers, from contamination. They manage and clean stormwater and wastewater. This aids in the preservation of ecosystems and biodiversity.

  • The Basic Principles of Underground DrainageStormwater Management

In addition to collecting and directing stormwater from various sources, such as rooftops, roads, and more, these systems work to avoid waterlogging and flooding. They then channel this water to treatment plants or proper drains.

  • Treatment and Disposal

Underground drainage systems typically link to sewage treatment plants. These plants treat wastewater before releasing it into the environment. This way, we know that the water is clean enough to reuse or discharge after removing any contaminants.

  • Flood Prevention

In the event of a strong downpour or storm, underground drainage systems can lessen the likelihood of flooding. They effectively divert runoff away from populated areas.

  • Wastewater collection and transportation

Sewage from industries, commercials, and homes is gathered via underground drainage systems. This encompasses effluent from various plumbing fixtures, such as showers, sinks, and toilets.

Importance

  • Economic Advantages

A safe and stable environment boosts economic activities. There’s a reduction in health-related costs. This is achieved through improved sanitation and infrastructure damage prevention through effective drainage systems. In order for a city’s economy to thrive and expand, they are essential.

  • Sustainability in the Environment

These systems help create a cleaner, more sustainable environment. They help manage wastewater treatment and stormwater control. They also mitigate the negative effects of human settlements on ecosystems, keep water supplies clean, and keep water sources themselves pristine.

  • Urban Development

Underground drainage systems are critical for city infrastructure. Their construction makes urban areas safer from sewage backups and flooding. This improves living conditions for city dwellers.

  • Infrastructure Resilience

Cities are better able to withstand severe weather if they have a well-developed system of underground drainage. It reduces the likelihood of flooding. This translates to less downtime during storms and less money spent fixing things afterwards.

  • Public Health

By securely disposing of waste and sewage, good drainage systems limit disease spreading. In the absence of these systems, typhoid and cholera outbreaks could occur. Untreated sewage pollutes potable water sources, resulting in this.

All four of these areas—economic stability, environmental protection, public health, and urban development—rely heavily on underground drainage systems. They make sure that there’s proper management of stormwater and wastewater, which protects people and the environment.

Challenges and Maintenance

In order to keep underground drainage systems free of structural damage, leaks, and clogs, it is important to inspect and clean them regularly. Aging infrastructure, sediment accumulation, and root intrusion are common problems. To maintain their effectiveness in bolstering a city’s flood resistance and encouraging a clean environment, these systems must have enough planning and funding.

Conclusion

Modern infrastructure would not be complete without underground drainage systems. These collect and remove surplus water (usually from wastewater, runoff, or rainfall) in a controlled manner. This is to protect the environment, maintain sanitation, and prevent flooding. Having these systems buried helps with space conservation and shields them from the elements. It also keeps them as far away from regular life as possible.

Underground drainage is an essential part of city planning that helps city life run smoothly. It also protects the environment and contributes to public health.

How to Clean a Water Filter Pitcher

How to Clean a Water Filter Pitcher

By | Water Filtration | No Comments

If you want your tap water to taste better and be of higher quality, invest in a water filter pitcher. Typically, a glass or plastic pitcher houses a replaceable cartridge for filtration. To remove contaminants from water, this cartridge combines a number of filtration media, including ceramic, ion exchange resin, and activated carbon.

A water filter pitcher will help reduce the amount of harmful substances, including organic compounds, heavy metals, chlorine, and pesticides, that are in municipal water supplies. As a result, water for cooking, consumption, and other domestic uses becomes purer and tastes better.

The portability and user-friendliness of a water filter pitcher have made it quite popular. To use one, simply pour water from the main pitcher through the filter into the reservoir. All you have to do is fill it up with tap water. For homes with one person or more, there is a wide range of filtration capacities, styles, and sizes to choose from among these pitchers.

Steps to follow when cleaning a water filter pitcher

Periodically clean your water filter pitcher to ensure that the water you drink is free of bad smells, bacteria, and pollutants. You can easily clean a water filter pitcher by following these easy steps:

To clean your water filter pitcher thoroughly, remove any detachable elements, such as the filter, spout, or lid.

Remove the filter

  • If the filter is replaceable, remove it from the pitcher and place it somewhere safe. It is not best to wash or reuse filters because of their short lifespan.

Use warm water to rinse

  • Remove any sediment or debris from the water filter pitcher by rinsing the entire thing (spout, lid, body, lid) with warm water.

Prepare a cleaning solution

  • Warm water and gentle dish soap are all you need for everyday cleaning.
  • One cup of warm water and one tablespoon of baking soda make a powerful cleaning solution.
  • If you prefer a different method, you can dilute white vinegar with water and use it to eliminate smells and mineral buildup.

Scrub Thoroughly

  • Scrub the pitcher’s interior and exterior using a soft scrub or sponge. Give those hard-to-reach places, edges, and corners your undivided attention.
  • A cotton swab, little or small, will do the trick if your pitcher features a spout.

Rinse Completely

  • To get rid of any cleaning solution residue or leftover soap, rinse everything with warm water. Make sure the cleaning products don’t leave any unpleasant aftertaste.

Dry the Pitcher

  • Let the pitcher air dry entirely before putting it back together.
  • Dry the parts by setting them on a clean towel or dish rack.

Reassemble the pitcher

  • Reassemble the water filter pitcher after all components have dried.
  • When using a new filter, carefully read and follow all installation and soaking directions.

Regular Maintenance:

  • To maintain clean water and avoid buildup, clean the pitcher every one to two weeks.
  • Maintain the quality of the water by replacing the filters according to the manufacturer’s instructions.

Follow these tips to extend the life of your water filter pitcher and keep it clean.

Do water pitchers need to be washed?

Yes, it is important to wash your water filter pitcher on a regular basis to keep it clean and free of algae, bacteria, and other pollutants. It is essential to clean them regularly, even if you simply use them for water, because:

  • Mold and mildew

If the pitcher remains damp for an extended period of time without cleaning, it poses a health risk.

  • Residue and Stains

Water minerals like lime or calcium can discolor pitchers when they pile up and leave stains.

  • Biofilm and bacteria

Bacteria that spend a lot of time in moist environments can form a sticky covering called a biofilm. The water’s taste and safety are both impacted by this.

How to Clean a Water Filter PitcherFor an easy-to-follow cleaning regimen:

  • Disassemble the pitcher

Remove any parts, such as filters, before washing.

  • Use warm, soapy water

Using a soft sponge or brush, clean each part completely.

  • Rinse Well

To keep the water’s taste intact, be sure to rinse it well after using soap.

  • Air Dry

Before putting the pieces back together, make sure they are totally dry to avoid any problems due to moisture.

If your water filter pitcher gets a lot of use, you might want to clean it more frequently than once a week. If it comes with a filter, be careful to replace it according to the manufacturer’s directions for the best water quality.

Things to consider while choosing a water filter pitcher:

  • Pitcher Size

Choose the right size for your home.

  • Flow Rate

How fast is the water filtration process?

  • Filter Type

Specific types of pollutants are the targets of filters. Make sure it solves your problems.

  • Filtration Capacity

What amount of water does the filtering capacity last before the cartridge needs to be changed?

Some well-known brands are Aquagear, PUR, Brita, and ZeroWater. Make sure to review the filter specs for any specific pollutants you may be concerned about, such as organic compounds or heavy metals.

The benefits of cleaning a water filter pitcher are significant.

For optimal performance, safety, and durability, it is essential to clean a water filter pitcher on a regular basis. Among the many advantages, some stand out:

  • Off-tastes and Smells Prevention

The water in the pitcher could have a bad taste or smell if there are bacteria, mold, or sediments in it. Cleaning gets rid of these impurities, so the water stays clean and tastes the same.

  • Long-Lasting Filter

Keeping the pitcher clean lessens the strain on the filter, which could lead to its extension. This can result in cost savings because the filter will not require replacement as frequently.

  • The Pitcher Will Last Longer

The water filter pitcher can last longer with regular cleaning and maintenance. It prevents accumulation, which means the pitcher stays in good shape.

  • The Filtration System’s Reliable Performance

Dirtiness affects both the efficiency and flow rate of a water filter pitcher. Regular cleaning ensures that the filtration performance remains constant.

  • Improved visual appeal

The aesthetics and usability of a water filter pitcher are both improved by regular cleaning. Keeping things clean is important to avoid unattractive stains and buildup.

  • Decreased Risk of Health Problems

Mold and bacteria can thrive in an unclean pitcher, which is dangerous for your health. You can rest easy knowing that these problems are less likely to occur when you clean regularly.

  • Enhanced Water Quality

Bacteria, mold, and sediment can build up in a water filter pitcher with time. By removing these impurities through cleaning, we can guarantee that the filtered water is always safe to drink.

Disassembling the pitcher and washing each item in warm, soapy water is the standard procedure for cleaning a water filter. After that, make sure everything is completely dry before putting it back together. For further information on how to clean and when to replace the filter, be sure to refer to the manufacturer’s manual.

Conclusion

Pitcher water filters are less expensive and easier to set up than other types of water filtering systems, such as whole-house and under-sink filtration systems. If you are looking for a simple, low-cost way to improve the quality of your drinking water without having to worry about extensive installation or maintenance, a water filter pitcher is a good option.

5 Steps on How to Change a Fridge Water Filter

5 Steps on How to Change a Fridge Water Filter

By | Water Filtration | No Comments

A fridge water filter can improve the quality and purity of dispensed water from refrigerators through their ice and water systems. In order to guarantee that the ice and water from the fridge are pure and safe to drink, these filters usually eliminate any nasty tastes or smells, pollutants, or impurities that may be present in the water.

These filters are a must-have if you want to avoid buying bottled water or investing in a separate water filter. To remove pollutants, they circulate water through a series of filtering media, such as ion-exchange resins or activated carbon. Pesticides, sediment, chlorine, heavy metals, and certain microbes are among the typical contaminants that a fridge water filter filters out.

Depending on use and water quality, you should change your fridge water filter every 6 months, as is the recommended replacement schedule. Typically, the design facilitates easy replacement of the filters. Installing or replacing a fridge water filter is a breeze with most new models, which include ice and water dispensers with built-in filter sections.

Signs of a problem with your fridge water filter

If you have a fridge water filter, the ice and water that come out of it are more likely to be pure. However, over time, the filter may become clogged or lose its usefulness. If you notice any of the following issues with the fridge water filter, it may be time to replace it:

  • Problems when Producing Ice

A blocked filter can limit the water flow to your ice maker. This could explain why it isn’t making enough ice or isn’t making ice at all.

  • Nasty Smell and Taste

Nasty odors or tastes in your refrigerator’s ice or water may be a sign that the filter isn’t doing its job.

  • Water Leakage

The presence of water dripping from the dispenser or filter housing could indicate an issue with incorrect installation or the fridge water filter itself.

  • Discolored or Cloudy Water

Clear water is considered to be clean. It may be an indication that the fridge water filter is not working properly if the water has a strange color or appears cloudy.

  • Visible Sediment or Debris

Sediment or particles in your ice or water could indicate that the fridge water filter isn’t performing its intended function.

  • Strange Noises

If the filter is faulty or clogged, the water dispenser or ice maker can make sounds like gurgling or something else entirely.

  • Indicator Light

You can find a filter change indicator light on some fridges. If this light is on, you need to change the filter immediately.

  • Reduction in Water Flow

The water flow from your refrigerator’s dispenser may be significantly reduced if you find that the filter is obstructed and limiting the flow of water.

If you experience any of these issues, consult the manufacturer’s recommended filter replacement schedule. The recommended replacement interval for a fridge water filter is 6 months. However, this can vary depending on water quality and usage. There may be more serious problems with the fridge that necessitate expert repair if the problems persist after you change the filter.

5 Steps on How to Change a Fridge Water FilterHere are steps on how to change a fridge water filter.

If you want to change the fridge water filter, there are a few easy steps to do so, although they may be slightly different for different types and models of filters. In general, here is what you should do:

Step One: Locate the water filter.

  • If you can’t locate the fridge water filter, try taking a look or consulting the manual. It could be on the bottom, next to the kickplate, or at the rear or top of the fridge compartment.

Step Two: Prepare for Replacement

  • If your ice maker requires a filter, turn it off before it can make ice.
  • A container or towel should be ready to catch any water drips before you remove the filter.

Step Three: Remove the old filter.

  • To remove the filter, you can either twist it out of the way or press a button, but this varies by the model of the fridge. Read and follow all of the manual’s directions. When you take the filter off, make note of the direction it is facing.

Step Four: Installing a new filter

  • Follow the manual or filter’s directions to twist it if necessary. As soon as the filter is firmly in position, you should detect a clicking sound or sensation.
  • Carefully place the replacement filter into the housing, making sure it is facing the right way.
  • Locate the new filter and loosen any seals or caps that may be protecting it.

Step Five: System Flush

It is essential to flush the water system after replacing the fridge water filter in order to remove air and carbon particles. Fill the water dispenser with a few liters or flush according to the manufacturer’s instructions.

After flushing the system, restart the ice maker and, if your fridge has one, reset the indicators that show when the filters need changing.

You should have no trouble changing the fridge water filter if you follow these instructions. Refer to your user guide or get in touch with the manufacturer’s customer service if you have any questions or need clarification on any of the steps.

Benefits of a fridge water filter

A fridge water filter has several advantages, one of which is that it ensures that the ice and water you get from your fridge are tasty, safe, and clean. The following are some of the most significant advantages:

  • Cost Savings

Buying bottled water or investing in other filtration systems can add up in the long run, whereas a fridge water filter can save you money. Additionally, it can minimize the need to buy individual water pitchers or other kinds of water purification equipment.

  • Easy to Maintain

Depending on consumption, most fridge water filters only require replacement every six months or so. They are also easy to replace and require minimal care.

  • Improved smell and taste

Your water’s smell and taste will be greatly enhanced by using one of these filters to remove chlorine and other contaminants. This will enhance both your cooking and drinking experiences.

  • Reduced Plastic Waste

To reduce plastic waste and increase environmental sustainability, a fridge water filter can be used to reduce the need for bottled water.

  • Healthier Water

The removal of impurities from water not only improves general health but also reduces the health risks associated with the consumption of dangerous substances.

  • Filtered Ice Cubes

You may be certain that your ice is just as clean and pure as your drinking water. This is because many water-filtering fridges also use filtered water to generate ice cubes.

  • Ease of Use

You won’t need to buy bottled water or use a separate filtering system if you keep a water filter in your fridge.

  • Improved water quality

The purpose of a fridge water filter is to purify the water supply by removing harmful substances, including pesticides, lead, chlorine, mercury, and other contaminants. The result is water that is both safer to drink and cleaner.

When it comes to drinking water and ice, a fridge water filter is an easy and practical solution to guarantee that it is safe, clean, and tastes excellent.

Conclusion

If you want better-tasting and safer water without the hassle of buying bottled water, a fridge water filter is a great investment in a greener lifestyle. Modern refrigerators with ice and water dispensing functions aren’t complete without them. They make it easy to get filtered water right from the fridge.

Common Drain Problems in the House and How to Fix Them

Common Drain Problems in the House and How to Fix Them

By | Drainage Systems | No Comments

There are a variety of issues that can arise as a result of drain problems in a house, ranging from minor inconveniences to serious structural damage. Homeowners can take proactive steps to address drainage issues by becoming aware of common signs and causes.

Common Drain Problems in the House

Structural damage, clogs, slow drainage, and even nasty smells can result from ignoring issues with your home’s drains, which can build over time. Some typical drain problems are as follows:

Damaged or Collapsed Pipes:

  • Structural issues, like a settling foundation, can impact drain lines.
  • Older or exposed to extreme weather pipes may burst or sustain other damage.

Issues with Fittings and Pipes:

  • Higher water bills, mold growth, and water damage are all possible outcomes of leaks.
  • Pipes and fittings could spring a leak due to poor installation, physical damage, or corrosion.

Slow Drainage:

  • Slower flow rates can sometimes be caused by the accumulation of grease and other debris in pipes.
  • When drains are partially clogged, water may pool in bathrooms due to slow drainage.

Overflows and Backups:

  • Because sewage pollution is possible, it may pose a health risk.
  • If the main sewer lines become clogged, water will back up into your house. This can cause toilets and fixtures to overflow.

Odors:

  • Sewer gases can leak into your home through dry drain traps, leading to unpleasant odors.
  • Bad odors can be caused by bacteria that grow in drains as a result of waste buildup.

Noisy Drains:

  • Loose or improperly installed pipes could be the source of rattling and vibration sounds.
  • Clogged drains can cause air to become trapped in the pipes. This can sound like bubbling or gurgling.

Blockages and clogs:

  • Clogged underground drainage systems can be due to tree roots that have grown into pipes.
  • Clogs in toilets, showers, and sinks can be caused by a buildup of various things, such as food debris, grease, hair, soap scum, and more.

How to fix common drainage problems in the house

Common home drain problems can cause health risks, unpleasant smells, and even water damage. If you catch these problems early and correct them, you can avoid costly repairs and enjoy a more comfortable living area. The following are examples of common drain problems and how to fix them:

  1. Overflowing Toilets

The mess and inconvenience of a toilet that overflows are real. Toilets can overflow for a variety of reasons.

Causes

Issues with Septic Tanks

  • Sewage backups can cause toilet overflows. This can occur when a septic tank is overflowing or not functioning properly.

Blocked sewer line

  • Overflowing toilets and other plumbing problems can occur if the main sewer line becomes clogged and sewage backs up into your home.

Blocked Vent Pipes

  • Vent pipes allow the plumbing system to expel air. This ensures that the pressure remains appropriate. Overflowing toilets could be caused by clogged drains.

Clogged pipe and drain

  • Blockages in the sewer line or drainpipe are the most common reason for toilet overflows. This may occur as a result of waste and debris buildup, an overabundance of toilet paper, or non-flushable objects such as feminine hygienic products or wet wipes.

Solution:

  • Proper Use

Sanitary products, diapers, or wipes are not flushable, so don’t flush them.

  • Drain Snake

For more difficult clogs, a drain snake might be useful.

  • Inspect the Flushing Mechanism

Check the flapper and float to make sure they are working accurately.

  • Plunger

To remove the obstruction, use a plunger.

  1. Slow Drains

Clogged or blocked drains are annoying and usually indicate a more serious plumbing system problem.

Common Drain Problems in the House and How to Fix Them

Common Causes:

  • Tree roots

Tree roots can penetrate outdoor plumbing systems and obstruct pipes.

  • Foreign Objects

Wipes, feminine hygiene products, and paper towels are all potential clog-causing items.

  • Grease and food debris

Oil and grease buildup, together with food particles, can cause clogged kitchen sinks.

  • Mineral Accumulation

When water is too hard, minerals can build up in pipes and make draining more difficult.

  • Soap scum and hair

The accumulation of soap scum and hair in bathroom tubs, showers, and sinks is a common cause of clogs.

Solution:

  • Professional Plumber

If none of those things work, or if the clog is more serious, a plumber can clean and inspect the pipe system thoroughly.

  • Drain Cleaner

While chemical drain cleaners are effective at dissolving organic matter, they pose a threat to pipes if used improperly.

  • Drain Snake

This instrument can physically remove even the most stubborn drain clogs.

  • Boiling Water

Pour boiling water down the drain to partially remove minor blockages.

  • Take the Trap Out and Wash it Out

If there are any clogs in the trap (the bent pipe under the sink), take the sink apart and clean it.

  • Plunger

If a clog persists after trying to use a plunger, try another method.

Vinegar and Baking Soda

Vinegar and baking soda, when combined, can cause a chemical reaction that will dissolve obstructions.

  1. Overflowing Gutters

Foundation issues, mold growth, and water damage are just a few of the issues that can arise when gutters overflow.

Causes

  • Insufficient Downspouts

Water might not be able to drain fast enough if the number or size of downspouts is inadequate.

  • Extreme Downpour

Intense downpours can overwhelm the capacity of your gutters.

  • Improper Installation

Water can overflow gutters if they are not sloped or placed correctly.

  • Clogs

Gutter blockage can occur when debris, twigs, leaves, and other materials gather in gutters.

  • Incorrect Maintenance

Gutter blockages can be caused by a lack of regular maintenance and cleaning.

Solution:

  • Inspect the drainage system

Check the drainage system and downspouts to make sure they are in good working order.

  • Pitch Adjustment

For water to flow into the downspouts, you must pitch the gutters correctly.

  • Install gutter guards

Gutter guards are a great way to keep your gutters clear of debris.

  • Adding downspouts:

Think about getting bigger or installing extra downspouts if the ones you have aren’t big enough.

  • Consistent cleaning

At the very least, you should clean your gutters twice a year.

  1. Clogged Drains

Clogged drains are the most common problem with residential drainage. Debris such as soap scum, grease, hair, or other materials can cause them to appear in various bathroom fixtures.

Causes

  • Mineral buildup

Pipes can become clogged due to mineral deposits in hard water.

  • Soap Scum

Buildup over time has the potential to clog pipes.

  • Oil and grease

It tends to clog garbage disposals and kitchen drains.

  • Foreign Objects

Common clog-causing items include paper towels, cotton swabs, and baby wipes.

  • Food Waste

The most typical clog-causing items in kitchen drains are fibrous veggies, eggshells, and coffee grounds.

  • Hair

This stuff is a common cause of clogged drains in bathroom tubs, showers, and sinks.

Solution:

  • Expert Help

Consider calling a plumber if you’ve exhausted all other options or are still confused about the origin of your drain problems.

  • Boiling Water

Effectively removes soap scum and grease from kitchen drains.

  • Drain Snake/Auger

Assists in unclogging pipes that are further down the line.

  • Chemical drain cleaners

When using them, be cautious because they are toxic to plants and can corrode pipes.

  • Baking soda and vinegar

After you pour the baking soda down the drain, add the vinegar. You should wait a few minutes before flushing it with hot water.

  • Plunger

Works wonders in bathtubs, toilets, and sinks. Produces suction to remove the obstruction.

  1. Basement water seepage

When water seeps into your home’s foundation, it can lead to flooding, leaks, or moisture in the basement. This could cause problems such as increased humidity, structural damage, and mold growth.

Causes

  • Improper Slope

Water will flow towards the foundation if the terrain slopes negatively, that is, in the direction of the home.

  • Hydrostatic Pressure

When the ground around your home’s foundation gets too wet, water might seep in through any holes or crevices.

  • Foundation cracks

Water can seep into a basement via any structural gaps or cracks in the floor or walls.

  • Broken and Clogged Downspouts/Gutters

When gutters aren’t working properly, water can collect near the foundation.

  • Poor Drainage

Water can pool around the base of a structure if the outside drainage systems aren’t adequate.

Solution:

  • Downspouts and Gutters

In order to keep water away from the foundation, make sure the gutters are clear and in good working order, and extend the downspouts.

  • Foundation Repairs

Prevent water seepage by repairing foundation cracks and other structural problems.

  • Grading

You should regrade your yard so that water can drain away from your house.

  • Drainage Systems

If you want to keep water away from your foundation, you should install or maintain a drainage system like French drains.

  • Waterproofing

For a watertight basement, seal the floors and walls with a waterproof membrane or coating.

Benefits of having good house drainage

Good house drainage greatly impacts both ensuring a safe and healthy living environment and maintaining the structural integrity of your home. Some important advantages of a well-designed drainage system are as follows:

  • Minimized loss of soil

Soil erosion can ruin landscapes, driveways, and pathways if water runoff isn’t directed correctly.

  • Decrease in Mildew and Mold

Mold and mildew can cause damage to your house and health if left unchecked. However, effective drainage can keep water away from the foundation, lowering the risk of these problems.

  • Enhanced safety

Make sure your walkways and yard drain well in the winter to keep them safe from ice conditions and puddles.

  • Preservation of landscaping

Waterlogging in lawns and gardens can harm soil and plants; therefore, it’s important to have a drainage system that works.

  • Increased home value:

People are more inclined to view a home with a solid drainage system as a low-maintenance investment with good structural integrity. This, in turn, increases the home’s resale value.

  • Protecting the foundation

To avoid shifting, cracks, and other structural problems, make sure water doesn’t seep into the foundation.

  • Protection against pests and insects

Mosquitoes, for example, can breed in stagnant water. With proper drainage, the risk is reduced.

  • Protecting against water damage

Water can cause erosion, foundation damage, and flooding in basements if it pools around homes without proper drainage.

A properly planned drainage system benefits a property’s longevity, reduces maintenance costs, and improves health and safety.

Conclusion

You can keep your home safe and pleasant by fixing these typical drain problems quickly and preventing further harm. If the issue continues or you aren’t sure what’s causing it, it’s best to call a professional plumber for assistance.