Express Drainage Solutions

A Solution for Sanitation, Wastewater Treatment & Renewable Energy

Njengi House

2nd Floor Suite 6, Tom Mboya St.

8:00AM - 5:00PM

Monday to Friday

+254742781455

info@expresswatersolutions.com

All Posts By

Antony Muya

How to Ensure Your Borehole Water Tastes Better

Is Borehole Water Cleaner Than Tap Water?

By | Water Quality | No Comments

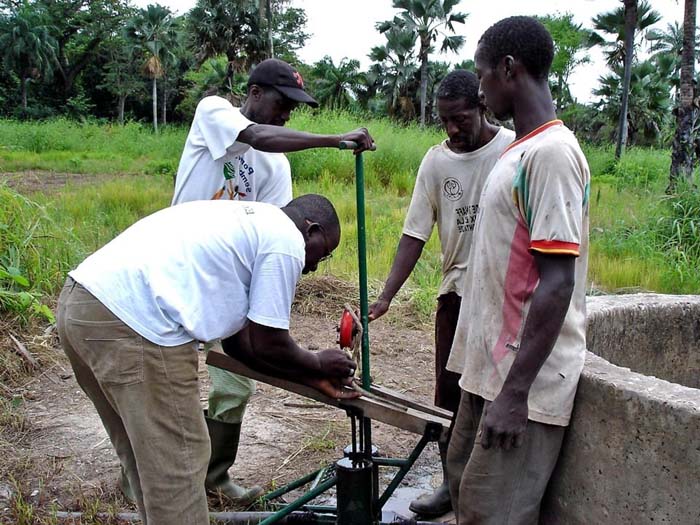
Boreholes provide unrestricted, cost-free access to a private water supply of up to 20,000 liters daily for households and businesses. A borehole installation is a more cost-effective long-term solution for many businesses requiring water daily, including golf courses, hotels, and farms. Since borehole water is treated differently than tap water, many people are skeptical about the safety of this seemingly endless supply of free water.

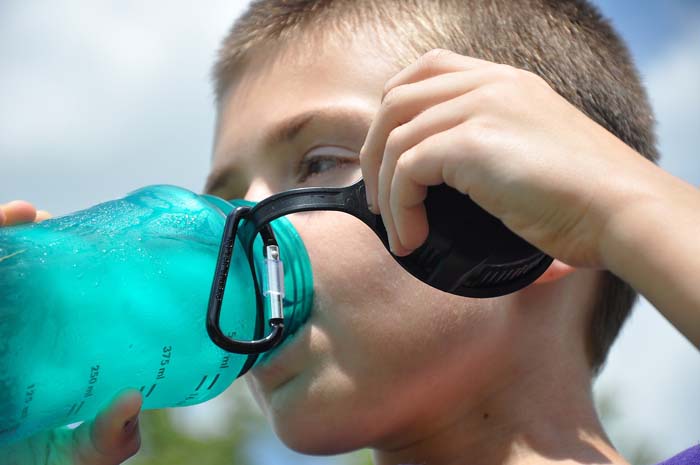
Using a water borehole is beneficial in many ways. While most residential customers are looking for a less expensive water option, they also want to know that the water they get will work for all their household needs. The water flowing out of a borehole must be potable and safe for all household uses, including washing, drinking, and cooking.

What makes borehole water different from tap water?

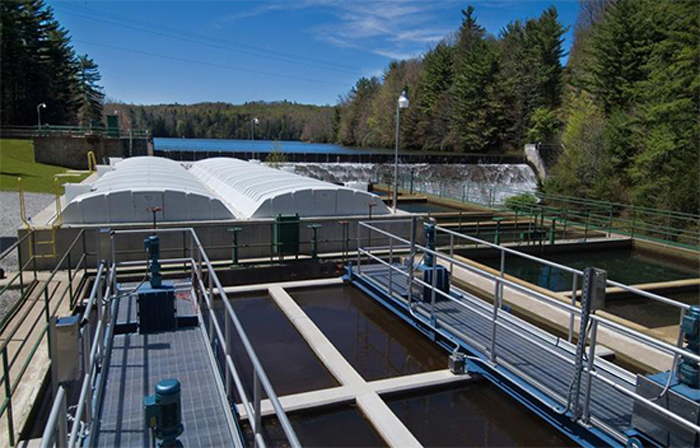
Borehole and tap water supply originate from entirely separate locations, which is the primary difference. Recycled wastewater that has undergone filtration to ensure its safety for human consumption is the primary source of tap water. Conversely, tap water is treated before it’s piped into homes and businesses, while borehole water is drawn directly from the earth. Borehole water only sometimes requires treatment because it comes from a natural source.

Drinking water from boreholes is typically safe. It is important to test your water source to ensure it meets drinking water regulations.

Negative effects of boreholes?

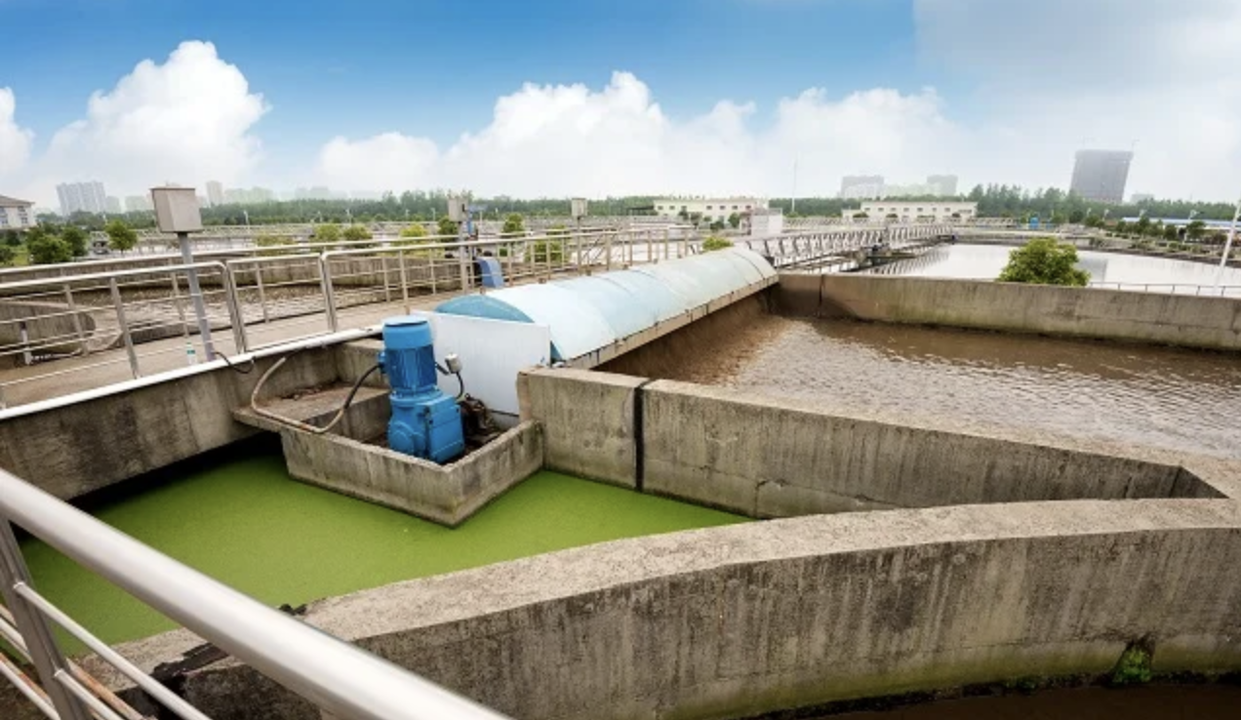
Drilling and building activities related to boreholes can disturb local ecosystems. They can also introduce pollutants into the groundwater, contaminating the water supply.

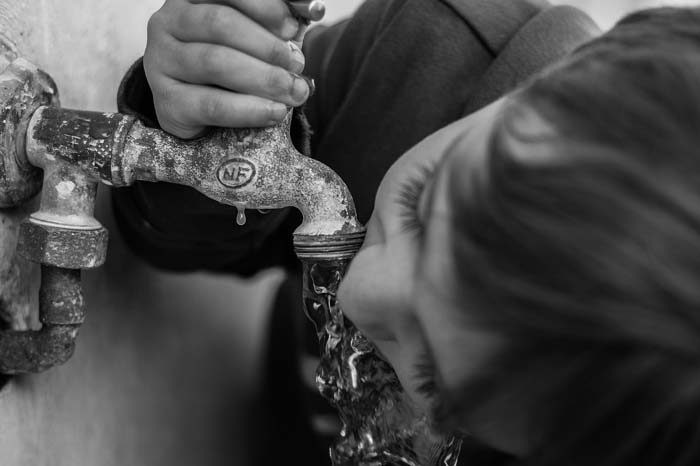
Can borehole water cause stomach problems?

Sewerage seepage from nearby septic tanks poses a threat to boreholes. The contamination of boreholes can also be due to other types of household waste. Regular water withdrawal from a large number of boreholes alters the saturation level of moisture. This leads to groundwater receding. People who come into contact with this polluted water have reported experiencing stomach problems.

Viruses, chemicals, minerals, and bacteria can affect borehole water. The quality of shallow groundwater is most affected by human activities, though, because:

  • Chemical leaks that occur on the job.
  • Systems for disposing of liquid waste, such as septic tanks, that are not well-maintained
  • Leaking chemical and fuel tanks
  • Leaching from waste disposal areas
  • Intensive mining, industry, or agriculture
  • The misuse or overapplication of insecticides, pesticides, animal manures, and fertilizers

Can you boil borehole water and drink it?

Since water from a deep borehole is unlikely to contain many harmful microbes, boiling it may not be necessary either. You can drink the water straight from the source or use a decent filter to make it safer if it tastes okay and is from a good depth.

The white stuff in the borehole water?

Boiling borehole water causes the water to evaporate, leaving behind the salt, which turns the water into a white powder. This is because borehole water includes salts. The white substance is unrelated to salt.

Advantages of Borehole Water

  • Contamination from natural calamities like cycles, fires, floods, etc., does not usually reach groundwater. Borehole water is generally safe, although polluted municipal water supplies are often the first to go.
  • Save money on water bills. The sole cost you’ll incur is filter and pump system maintenance. This is because you’ll be using water dug from your property.
  • The mineral content of bore water is higher than that of treated water from cities. There isn’t a chemical additive in sight, and the water is as pure as it gets from far underground. Borehole water is rich in those beneficial minerals and is chemical-free.

Cons of Bore Water

Disadvantages of borehole water

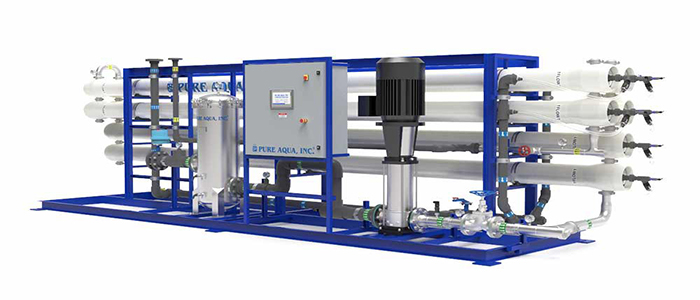
  • It is important to employ a water filter to purify the water that enters your home before drinking it, as the homeowner is responsible for the borehole water.
  • The water in the bore is dirty. There are several potential sources of contaminants in borehole water. These include pollution from nearby factories, stormwater run-off, nitrates from adjacent farms, sewerage discharge, and pesticides.
  •  Borehole water uses power. A power outage means a water shortage. Solar panels or batteries can be a lifesaver for borehole water systems. These rely on pumps to bring water from aquifers to homes and businesses.

Conclusion

Contact Express Drainage Solutions if you have questions or want to schedule a consultation on boreholes for residential or business use. As the leading borehole drilling contractor in the nation, we take great satisfaction in consistently completing projects to the highest standard of professionalism. Our seasoned engineers ensure we can make an informed decision regarding the optimal location to obtain a reliable water supply by conducting thorough surveys and analyses.

What is ORP in Water Treatment and How to Measure It?

Steps of Commercial Plant Water Treatment

By | Water Treatment | No Comments

Commercial plant water treatment aims to ensure that potable water is free of any biological, chemical, or physical contaminants that could endanger its purity for human consumption or household use. With this procedure, you can make water that is clean, tasty, odorless, colorless, and safe to drink. The water must also not be corrosive so as not to harm the pipes.

Here are the steps for commercial plant water treatment

Water sources for collecting

The first step in treating water is gathering it from different places, such as underground aquifers, reservoirs, or rivers. The accessibility and placement of water resources determine the potential sources. It may be necessary to use specialized treatment technologies to guarantee the safety of the water because its quality can vary.

Screening and Intake

A preliminary screening procedure will help remove big debris from the collected water, such as floating materials, twigs, and leaves. Fine and coarse screens help to filter out these contaminants from the water. Water treatment plants use coarse screens. These feature rust-resistant steel bars spaced apart. This is to help remove more significant contaminants and fine screens, which include micro strainers, to capture particles as tiny as plankton and algae.

Pre-chlorination and aeration

Once screening is complete, it goes to the treatment facility for aeration. Gases like hydrogen sulfide and carbon dioxide are removed from water by adding air, a process known as aeration. Thus, this procedure aids in lessening the water’s corrosiveness and removing any off-putting odor or taste brought about by gaseous organic compounds (GOCs). Overgrowth of algae, which can block downstream filters, necessitates pre-chlorination in certain instances. As part of commercial plant water treatment, chlorination eliminates algae and oxidizes chemicals that cause bad smells and tastes.

Flocculation and coagulation

After aeration and pre-chlorination, the water moves to the flocculation and coagulation steps. They add a coagulant, like ferric chloride or aluminum sulfate, to the water. This counteracts the negative charge of the tiny particles floating in the water. The coagulant combines these particles into bigger masses known as flocs. As a result, flocculation, which involves slightly stirring the mixture in flocculation basins, causes the flocs to grow. This makes their subsequent removal easier.

Sedimentation

Sedimentation is the subsequent primary unit process that the flocculated water undergoes. Sedimentation is a technique that reduces the particulate load on filters by removing suspended solids that are denser than water. To achieve sedimentation, the treated water’s velocity needs to be reduced below a point where it can carry settleable suspended material. This will enable easy removal of the suspended particles by gravitational forces.

When sedimentation basins are nearly empty, any settled sediments will sink to the bottom. Sedimentation is a powerful process that may filter out almost all the suspended particles in water. The surface water that is already quite clear is gathered in the washing tubes, which are then sent to the filter gallery to filter out the remaining 10% solids.

Filtration

As a last step in the commercial plant water treatment process, the chlorine-settling water goes to the filtration facility and is filtered there. If any particulate contaminants remain after sedimentation, they can be eliminated by filtering the water through a sand or coal bed medium. The water treatment plant employs gravity filter beds that use multi-media at a quick rate. In order to filter water, the filters have:

  • Anthracite at the top
  • Filter sand in the center
  • Garnet sand at the bottom
  • An underdrain system

Water enters the filter medium at the top and, due to gravity, flows down through the filter beds. The various materials combine as a massive strainer, collecting any leftover particles. Operators clean the filters by backwashing them when they begin to become clogged with particulates. The trapped particles are released as potable water flows backward through the filters into the drain troughs. After reaching the Backwash Recovery Pond, the backwash water undergoes a settling process before being recycled into the raw water settling pond.

Disinfection 

The next step, after filtering, is disinfection, which gets rid of any lingering harmful microbes. Common disinfectants include chlorine dioxide, chlorine, chloramines, ammonia, and chlorine mixtures. By eliminating potentially dangerous microbes, these compounds guarantee that the water is fit for human consumption. Fluoride is frequently included to further aid oral health by preventing tooth decay.

After disinfection, the commercial plant water treatment process often adds fluoride and changes the pH of the water. Decreasing rust (pipe breakdown), improving the taste, and ensuring chemical disinfectants continue to eliminate germs while water passes through pipes are all achieved by adjusting the pH. Prevent tooth decay and strengthen the enamel by consuming water with an appropriate amount of fluoride.

Advanced treatment methods

Some commercial plant water treatment facilities use cutting-edge methods to improve water quality further. The two most famous processes are ultrafiltration and reverse osmosis (RO). In reverse osmosis (RO), water is filtered by forcing it through a membrane with microscopic holes. Meanwhile, desalinating saltwater for human use or purifying recycled water are two applications where this technology shines. Conversely, ultrafiltration separates water from charged particles, salt, and bigger molecules using a filter membrane with minute pores.

Ozone treatment and UV sterilization

Commercial plant water treatment occasionally employs ozone treatment and ultraviolet sterilization as alternate disinfection procedures. Ozone and ultraviolet radiation can effectively kill microbes and bacteria in water. Thus, ultraviolet light kills bacteria and other microbes by destroying their DNA and making them sterile. Ozone, a strong oxidizing agent, also chemically destroys microbes. These cutting-edge treatment methods guarantee the most stringent water safety standards, which offer an extra buffer.

Distribution of treated water

The water is prepared for distribution to end-users like businesses and households once it has completed the required treatment processes. A system of pipes helps to transfer the treated water to its ultimate location.

Commercial plant water treatment methods

  • UV sterilization filters

Ultraviolet light sterilization is one of the best ways to disinfect water and eliminate bacteria and other pathogens. UV radiation will destroy any microorganisms, including protozoa, bacteria, and viruses, to make drinking water safe.

  • Activated carbon

The activated carbon water filter is one method used in commercial plant water treatment. It traps pollutants and harmful substances in the water by attaching them to carbon. Carbon filters aid in water purification by absorbing pollutants. Carbon filters can help remove chlorine and other dangerous compounds from water.

  • Reverse osmosis

Many commercial water filtration plants employ reverse osmosis water purification systems because they are very versatile. A RO-based system has been an excellent method for purifying water by eliminating bacteria, fluoride, and dissolved salts.

The advantages of commercial plant water treatment

Commercial plant water treatment has numerous potential applications in the food and beverage, pharmaceutical, healthcare, and manufacturing sectors, among many others.

Steps of Commercial Plant Water TreatmentPharmaceuticals

Water quality is more important for the pharmaceutical business than for many others.

  • Healthcare 

Poorly treated and managed water can significantly affect visitors’, staff, and patients’ well-being, security, and convenience.

  • Food and beverage 

The food and beverage business relies on water for everyday tasks, including washing and incorporating ingredients into recipes.

  • Manufacturing 

Minimizing the manufacturer’s environmental impact, enhancing operating efficiencies, and improving equipment lifetime are possible water treatments. A wide variety of manufactured items rely on it, including those in the building and construction, aerospace and defense, automotive, electronic, textile, rubber, and plastics industries.

Conclusion

Keeping the water supply safe for residential and commercial usage depends on the procedures performed at the commercial plant water treatment facility. Regular quality checks of the procedures are essential for meeting regulations. It will also provide the public with safe, healthy water. For this reason, it is necessary to employ experts who are familiar with water purification processes and who can maintain treatment plants.

How to Make a DIY Water Filtration System Using Sand or Gravel

How to Make a DIY Water Filtration System Using Sand or Gravel

By | Water Filtration | No Comments

In the event that you are looking to filter the water coming into your house but are on a tight budget, installing a DIY water filtration system will do. It can help eliminate numerous impurities from your water supply, and while it may not be as high-performing as commercially available filters, it’s still better than nothing. A big plastic barrel and a few other materials will work well to construct a DIY water filtration system.

Steps to making a DIY water filtration system

You’ll need these items

  • Gravel
  • Tubing
  • Large plastic barrel
  • Shovel
  • Sand
  • Knife

Wash your sand and gravel

If you want your DIY water filtration system to function, you must wash the sand and gravel well. You need to accomplish this before using them to fill the container. You should keep washing the gravel and sand until the water runs clear.

After this point, you may skip letting them dry because you’ll wet them soon enough.

Create connections in the container

Prepare some hard tubing; its length should equal the barrel’s diameter. In order to make it resemble a flute, use the knife to carve out holes along one side. Make sure the tubing can fit through the hole you cut out at the base of the barrel. Make sure the tubing’s holes are facing up as you insert it into the barrel.

In this way, the water in the barrel will be able to empty into your water supply. If the holes are too big, sand and gravel will be able to squeeze through.

Filling the container

The next step is to add gravel and sand to the container. Before you do anything else, fill it with water. This will make it much simpler to disperse the sand uniformly and avoid clumping. These are two issues that might compromise the efficiency of the filter.

The first one is gravel. Fill the barrel with gravel until it is several inches deep. You should start with the largest gravel pieces and work up to the finer gravel.

The next step is to begin adding sand. Use multiple thin layers, and let each one dry completely before proceeding to the next. Doing so will lessen the likelihood of distributional inequalities, which can be problematic in the long run. Keep filling it with sand until there’s hardly room for water at the top, which should be about a few inches.

Additional Tips

Keep your slow sand filter from freezing. Because of this, it will be useless. Depending on your connections, it could harm the connections as well.

In order to keep your filter working properly, you need to clean it occasionally. Slightly stirring the sand until a film of dirt appears on the water’s surface is the best way to do this. Carefully scoop out as much sand as you can without disturbing it.

The layers in your filter will become mixed up if you shake it too much, rendering it ineffective. You will now need to construct it from the ground up. To avoid damaging the top layer of sand, handle it with care.

Is it cheaper to filter your own water?

If you want to provide your family with clean, tasty water without breaking the bank, it is best to install a DIY water filtration system in your main water supply.

Safest method to purify water at home?

The best, safest, and most common way to eliminate parasites, bacteria, viruses, and other disease-causing pathogens is to boil or heat the water.

Conclusion

Do not take lightly the responsibility of ensuring that you have access to safe drinking water. In addition to guaranteeing access to delicious water, a DIY water filtration system will protect you from various harmful waterborne ailments. With its cutting-edge technology, an RO water purifier is still your best chance to ensure access to clean, safe drinking water, even though other methods exist.

Best Water Filtration Method for Home

Best Water Filtration Method for Home

By | Water Filtration | No Comments

Although most of us assume that the water we drink from the tap is completely safe, numerous undesirable chemicals can be present. This is due to old water infrastructure and other issues. Protect yourself and your family from harmful germs, heavy metals like lead, viruses, and chemicals with a water filtration system for your home.

An almost infinite number of water filters are available, each employing either chemical and physical barriers or a hybrid of the two.

Here are the best water filtration methods to consider

Activated carbon

Charcoal has a huge inner surface area to capture various pollutants because it is a highly porous carbon. When physical filters are unable to remove some contaminants, activated carbon can. It attracts chemicals such as volatile organic compounds (VOCs), pesticides, and lead, which it then traps internally as water flows through. The initial contact between water and carbon causes a reduction process. This is useful for chemicals such as chlorine.

Reverse osmosis

Many contaminants can be efficiently removed from water using reverse osmosis filters. These contaminants include salt, nitrites and nitrates, fluoride, radium, arsenic, copper, and hexavalent chromium, among many others.

The widespread use of reverse osmosis filters is due in large part to the fact that they provide excellent value for money. When it comes to filtering water, this water filtration method is matchless in its ability to remove impurities and harmful germs that can cause waterborne illnesses.

Steam distillation

Most pollutants are left behind after water boils into steam because their boiling points are greater than water’s. After that, the steam is gathered and cooled down until it becomes water again. Unfortunately, the harmful natural minerals in water are also removed during distillation.

Ion exchange

These filters remove undesirable ions, such as heavy metals, by releasing ions, such as sodium, and exchanging them with other ions. Although ion exchange makes your water softer and tastes better, it also increases sodium. It also doesn’t give you water with a totally pure taste.

How to install a water filtration system myself

Drill a hole in the tabletop.

  1. To facilitate the process, clear the space under your sink and inside the counter of any clutter and items. Lay down some old towels or rags to protect your floor from drilling debris.
  2. Find and mark the spot where you will place the tap for the filter system. The ideal placement is usually on the other side of the sink, perpendicular to the primary faucet.
  3. To keep it in place, most drill bits with a cup part help to make the drill run more smoothly. When working with a diamond drill bit, make sure you use double-sided tape to attach the cup portion and fill it with cold water.
  4. Drill at a medium-to-moderate speed without applying excessive pressure. You may keep the diamond drill bit cool by replacing the cup part with cool water when the water gets too hot.
  5. The rags underneath will collect any water or other debris that may remain when the drilling is complete.
  6. Slide the fittings and pipes of the house filter tap across the tap’s surface to determine whether the hole size is accurate. Check to see that the fixture is securely fastened in place and occupies the hole in an ideal manner.

Install the Tap Fixture

  1. The first step in stopping water from seeping into the cabinets is to secure the tap washer to the faucet.
  2. Use the provided bolt to hold the fixture in place after checking the hole size and installing the faucet washer.

Attach the water filter and the T-piece

  1. Disconnect the water main line under the sink using the stop clock. If none is present, the installation will necessitate cutting off the main water supply to the house.
  2. After turning it on, wait for the remaining water to drain from the faucet to relieve any remaining water pressure.
  3. To catch any water that drips from the sink, put the towels or rags underneath the water main.
  4. Install the T-piece after disconnecting the water main.
  5. Screw on the tap washer to secure the flexible pipe from the new T-piece to the water filter faucet.

Connect filter pipes to the filter system

  1. The filtration mechanism direction arrows aid in matching the pipe to the faucet. The pipes are also color-coded to correspond with the filter faucet pipes.
  2. Connect the pipes to the water filtration system after connecting them to the filter faucet.
  3. To ensure stability when submerged in water, the majority of filter cartridges include a base with a sticky bottom. 4. You should expect to replace filtration cartridges every 8,000 liters.

Final Tests

  1. Connect the water main line to either the house main or the sink’s water supply line and turn it on.
  2. Turn on the faucet and let ten liters of water through the filtration system.
  3. Check for leaks in the pipes and clean the water to determine if the water filtration system installation was successful.

Best DIY water filtration system

The ‘bio-sand’ filter is among the most widely used do-it-yourself water filtration systems. It uses a container with charcoal, gravel, and sand layers to filter water. The charcoal layer traps and eliminates tiny particles as well as some compounds, while the gravel and sand layers amplify the removal of bigger particles.

Do DIY water filters actually work?

There are a number of do-it-yourself water filtering options; however, their efficacy varies. While some may work better than others, the majority will fall short when it comes to offering all of these filtration options. Bleaching water, disinfecting tablets, iodine, ultraviolet treatment, and chlorine can all kill some bacteria.

But they are unable to eliminate:

  • chemical contaminants like pesticides
  • chlorine
  • Lead

The healthiest way to filter tap water

Are you in search of a reliable method for filtering water? While it’s true that store-bought filters may be attached to water pitchers and faucets to remove chlorine smell and taste, a whole house filtration system can eliminate minute impurities and instantly improve water quality.

This way, you may enjoy crystal-clear, flavorful water from every room in the house!

Best Water Filtration Method for Home
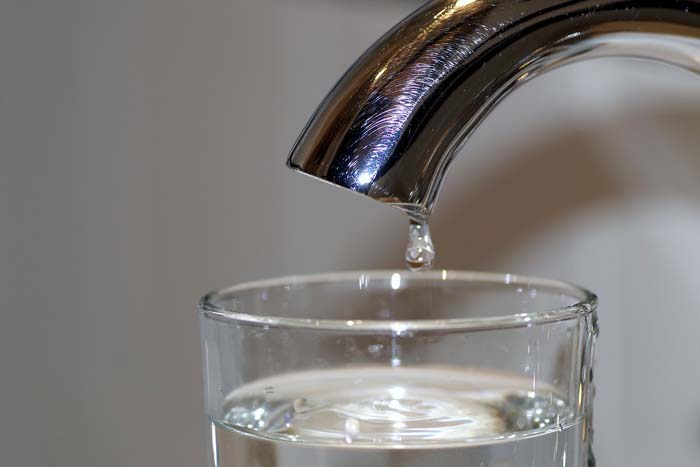
Is homemade filtered water safe to drink?

Never drink filtered water, no matter how “clean” it appears; there may be contaminants you can’t see.

How can I purify my water at home without a filter?

Boiling is the simplest approach that you can use to purify water without a filter. Always boil water before drinking or using it for cooking. This will ensure that the water is safe to consume. Boiling water kills any germs, viruses, and parasites that may be in it. If it becomes cloudy, allow the water to settle before straining it using a coffee filter, paper towel, or clean cloth.

Conclusion

Since various water filters remove different contaminants, the ideal system for filtering your tap water will depend on the specific toxins you’re trying to avoid. Since individual filters have limitations, it’s great that many available water filtration methods include a mix of filtration techniques. One such example is the utilization of absorption, mechanical, and, finally, reverse osmosis in systems that employ this process.

What Calls for Replacement of a Water Filtration System?

What Calls for Replacement of a Water Filtration System?

By | Water Filtration | No Comments

Knowing how your water filtration system functions is essential since no one wants to drink polluted water. Although filtered water tastes great, keeping track of when to replace the filters can take time and effort. In addition, since filter lifespans can vary, it is recommended to do routine maintenance to guarantee that your filters are in good working order.

Also, have extra filters on hand so you won’t have to drink unfiltered water in an emergency if you don’t know the warning signs. Keep in mind that your water filtration system can determine the exact amount of water that needs purification.

Imagine that there is a problem with your filters and that you need to change them. Express Drainage Solutions is the company to call for experienced maintenance and repairs in such a situation, saving you time and effort. Doing so will ensure that your filtration solution is dependable and long-lasting. Further, to ensure its continued operation, it is best to be vigilant for the following red flags:

Here’s why you should replace your water filtration system:

Slippery water

In most cases, filtered water will feel slippery when rubbed between the fingertips.

If your mains water is typically soft (with greater amounts of potassium or sodium ions) yet remains slippery after filtering, it’s time to change the filter.

Filtering speed is slow

Your system needs cleaning or a replacement if it was used to filter water quickly, but now it takes forever.

Filling a standard-sized tank with reverse osmosis water could take up to six hours if the filters are outdated or not working properly. However, the standard two to four hours should suffice to fill it if the filters are brand new.

Smell

Sulfur and chlorine (the “rotten egg smell”) are only two of the many unpleasant smells you can find in water.

However, you will likely want a replacement water filtration system if it can no longer remove them.

Scale accumulation or metallic aftertaste

The accumulation of minerals like magnesium and calcium in water causes it to be hard. This can lead to a scaling buildup on or within your water filtration system.

A metallic aftertaste in your filtered water is another indicator of hard water; you should definitely get a new filter.

Sound

If your water filtration system has been around for years, it may begin to make a laborious noise, similar to an old water pump. You should consider replacing your water filter before it breaks down if you hear strained sounds coming from it.

Can you clean and reuse a water filter?

Home water filters, in particular, do not have an indefinite lifespan. You can clean and reuse water filters instead of constantly changing them when their efficiency drops.

Remember that your filter will lose some effectiveness and filtration capacity after a certain number of cleanings and reuses. It doesn’t matter how much you clean it; after a certain amount of time, you’ll have to replace it.

Is there a need to replace water filter every 6 months?

If you don’t change your water filter every 6 months, the bacteria and other impurities in the water might saturate it and cause it to leak back into the processed water.

Is it safe to use an old water filter?

Old water filters, like other household equipment, may be in fine working order at first glance, but as time goes on, they lose some of their filtration capacity and have safety issues. It follows that the older water filters are functional as well. Getting a new one is also highly advised. The ideal use of resources is to maximize them, yet many people don’t get this and consider it a waste of money. An item that promotes well-being is the water filtration system. Our well-being depends on every one of the water filters’ minute components.

Conclusion

Even though not all of these symptoms may be present, it may be time to check your water filtration system if you see anything out of the ordinary. Additionally, any necessary repairs or replacements can be discovered during routine maintenance!

Get in touch with us if you have any questions about water filtration systems.

Simple Tips to Maintain Your Water Purifier

Simple Tips to Maintain Your Water Purifier

By | Water Filtration | No Comments

It is important to always be grateful for simple access to clean drinking water. If you want to consume water free of germs and other contaminants, you need a water purifier. You risk harming your health by drinking water of low quality. Installing a water filter is important since many of you may be receiving water that is not safe to drink. After taking care of that, it is just as essential to investigate how often water purifiers and their filters need servicing.

Here are a few tips that will help you maintain your water purifier:

Sanitize the water tank

Aside from changing the filters on a regular basis, you should also clean and sanitize your whole water purifier once a year. To do this, you must dismantle the purifier in order to access the membranes and the numerous connecting pipes. After that, you must wash and disinfect them before reassembling the unit. It also gets rid of any bacterial contamination that may have built up over time and takes care of any potential blockages in the system. In addition to doing this on a regular basis, you should also be aware that if your purifier starts to emit any bad tastes and smells, it’s time to clean it thoroughly.

Yearly maintenance

You should look into getting an annual maintenance contract for your water purifier. A proactive cleaning of the purifier and a couple of planned maintenance inspections are usually part of this. This way, problems won’t fester and can be handled promptly instead of when they become apparent.

Filter replacement on a regular basis

Regardless of the method your water purifier employs, you must replace the filters on a regular basis. Over time, these filters become clogged with various pollutants. The contaminants will have a negative impact on the performance of your water purifier as well as the water’s flow and smell. Over time, the water you drink will become contaminated with contaminants. Changing the filter on a regular schedule is important. Choose a water purifier with a service alarm that notifies you when it’s time to change the filters.

Keep the purifier in a clean area

Like any other device, your water purifier works best in an area with good ventilation. Daily cleaning of the purifier’s exterior, particularly the water distribution taps, is essential. In the end, this keeps your system looking brand new and decreases the likelihood of water contamination.

Never disregard leaks and drips

Your water purifier is vulnerable to damage from leaks and drips; therefore, you should never disregard them. Make an appointment for a professional inspection if you discover any leaking or dripping. Some components may be loose or worn out, leading to a leak or drip. Without delay, a specialist needs to address this. This is because it has the potential to cause several complications.

Do water filtration systems need maintenance?

For optimal performance, you must change water filters every few months. How often you need to change your water filter is directly related to the kind of filter you have and how much water you drink.

The lifespan of a water filter is significantly greater when installed throughout an entire house as opposed to a single fixture. There are a few parts that will eventually need changing. You can avoid water with an unpleasant taste by sticking to the replacement schedule. After replacing pre-sediment filters, soil, sediment, and rust can pollute the water. If they experience more wear and tear, their lifespan can decrease. If you consume water that has these particles, it could have a horrible texture and taste. Doing so puts yourself and your loved ones at risk of exposure to germs that can cause illness.

Life expectancy of a water filtration system?

Most likely, the manufacturer has set a lifespan for the water filter in your system. Reminders to change the filter are also included with high-tech water filtration systems. Remember to keep an eye out for any indications that the filter may need replacement at a later date, even if the manufacturer has given you a certain time frame in which to do so.

Gallons are the standard unit of measurement for a water filter’s lifespan. How long filters last is directly proportional to the water usage or the number of gallons of water that can be passed through the type of filter to produce clean, filtered water. The typical water filter has a 100-gallon capacity and a four- to six-month lifespan. Typically, the lifespan of each filter type varies. This may be the case, depending on the filter type and the water quality. The amount of water that passes through the filter and how often it is used are two major variables that impact its lifespan.

The typical lifespan of a water filter is roughly this long.

  • Post filter cartridges: one to two years
  • Countertop filters: six months
  • Carbon filters: six months to one year
  • Faucet water filters: two to three months
  • Shower water filters: three months to six months
  • Reverse osmosis membranes: two years
  • Sediment filters: six months to one year
  • Under sink water filter: three to six months
  • Refrigerator water filters: three months to six months

How often should a water filtration system be serviced?

The frequency of servicing for these systems is every twelve months or more frequently if the water hardness level is high.

How much does it cost to maintain a water filtration system?

The total cost of water treatment should include not just the initial investment but also any necessary repairs. The annual maintenance expenditures of a water softening system, including the cost of salt and replacing expired filter media, can reach $200 or more, depending on the system.

Simple Tips to Maintain Your Water PurifierWhat happens if you don’t clean your water filter?

You might expect a decline in the water’s quality. Once water filters are too clogged, they won’t be able to remove impurities as efficiently, and the water you drink won’t taste the same.

The filtration system will not function properly when you use an old water purifier. As a result, sediment and chlorine could be present in your drinking water. Your tap water could have an off taste or an unpleasant odor. You should also ensure no remaining sludge seeps into your water supply through the filter.

The water pressure in your home is another problem. When filters are “filled,” water passes through less readily. Commonplace chores, such as doing the laundry, can take much longer. The time it takes to get a shower would also lengthen.

In Summary

In addition to the measures above, it is essential to collaborate closely with a company that is well-versed in the correct way to maintain this kind of system. It is crucial to locate a trustworthy dealer for water treatment technology when looking for a replacement or making a new water purifier. Backwash filters, water treatment systems, ionizers, ozone systems, ultraviolet light systems, activated carbon whole house systems, and a plethora of other options are available from Express Drainage Solutions. In addition to assisting with the choice, their specialists advise maintenance.

How to Install an Undersink Water Filtration System

How to Install an Undersink Water Filtration System

By | Water Filtration | No Comments

Like a countertop filter, an undersink water filtration system attaches to the cold water pipe under your sink. After the water goes through the pressurized filter, it is redirected to the faucet as clean water that is free of contaminants. Certain undersink models require a distinct faucet. Another option, which may be more convenient for some homeowners, is to have the cold water supply go straight to the filter.

With the exception of reverse osmosis systems, an undersink water filter eliminates the need to dispose of dirty water by removing impurities from the water supply. Another feature of reverse osmosis water filters is a storage tank that sends the filtered water before reaching your faucet. Though they’re a bit more costly, reverse osmosis filters are worth considering. However, many undersink systems that consumers typically choose aren’t.


How to Install an Undersink Water Filtration System

Steps to install an undersink water filtration system

You can install an undersink water filter by connecting it to the cold water pipe under the sink. This pipe is intercepted during installation, and the installed filter is removed. Additionally, you may need to use an existing hole in a soap dispenser or drill a hole in the kitchen sink if your water filtration system does not come with a tap.

  1. Close the cold water supply valve

Two incoming water pipes and a drainpipe are visible when you open the kitchen sink cabinet. Since the filter is specifically designed for cold water, you will need to turn off the valve that supplies that water.

  1. Take out the tubing for the cold water

Disconnect the water supply to the kitchen sink. To remove the tubing from the water line, you will need to use a wrench to loosen the nut.

  1. Set up the feed/adapter valve

After that, attach an adapter to the line that supplies water. To connect the 1/4-inch tubing, use a copper T-adapter with a branch.

  • To make sure the threads are properly sealed, wrap them with Teflon tape.
  • Proceed cautiously as you thread the T onto the cold water line.
  • Make sure you have a snug fit using two sets of wrenches. Hold on a second; don’t pull too hard.
  • The next step is connecting the undersink water filter’s tubing to the copper T.
  • Then, fasten the stopper to the plastic pipe. Changing cartridges is a breeze with this little valve.
  • Put the nut that comes with the T-fitting into place.
  • Make sure the copper insert stays in by pushing it into the pipe.
  • Install the copper T fitting onto the tubing and secure it.
  1. You should make a hole in your sink.

A hole in the countertop must be drilled if the undersink filter system you purchased comes with an additional tap for filtered water. Additionally, the soap dispenser can fit well in the pre-drilled hole.

You will require a grinder to get the job done on a granite countertop. Keep in mind that it’s not easy; it gets dirty, and it can ruin the granite if you’re not careful.

  1. Put the new tap in place

After successfully drilling a hole in the countertop, the next step is to install the extra tap. While you tighten the fitting from the cabinet’s interior, a friend may help to hold the faucet on top.

Use caution while working with pre-drilled holes; they may be larger than necessary. So, to prevent water from leaking, insert some putty under the faucet’s gasket.

Connect the tap to the filter tubing using a set of washers, nuts, and a brass insert for the tubing inside your cupboard. Secure the fasteners.

  1. Mounting the filtration system

Mark the desired placement of the holes in the undersink water filtration system by holding it up against the side or rear of the cabinet. Step two involves using a drill to create the holes.

Ensure there’s enough room under the unit for the housing to be removed without hassle. Because it will support a substantial weight, you should also fasten the system to the cabinet.

  1. Connect the pipes and fixtures

Once you have established the connections, you may connect the filter steps. Find the two ports that are on the unit’s side. There is one for water entering and one for water leaving.

Connect the filter head’s internal adapter to the cold feed water line. The same goes for the tubing from the tap; insert it into the external adapter.

  1. Turn the water back on

Turn on the valve that you had previously shut off. The next step is to open the filtration system’s shut-off valve by sliding it vertically into the tube.

Open the valve carefully to avoid damaging the unit from the sudden high pressure. To let out any trapped air, click the button located on top.

  1. Inspect for leaks

Look for drips or leaks in every connection. Give them a quick fix.

  1. Give the system a chance to flush

Allow a few minutes of running cold water to flow from the tap. Before using fresh filter cartridges, ensure the line is clean and flush them. Instead of throwing it away, put it to use by watering plants or washing dishes.

Lastly, with your undersink filtration system set up, you may reap many benefits.

Do under sink water filters work?

A neat way to filter water is to use an undersink filtration system. These filters will provide pure water free of contaminants like heavy metals and pollutants whenever you need it. On the other hand, these units are expensive and could be difficult to install for those with little DIY skills.

An undersink water filtration system is a good investment if you want filtered water whenever you need.

How much will it cost to install an under-sink water filter?

A simple and inexpensive approach to purifying the water in your house is to install an undersink water filtration system. How much it will cost to have you install the filter depends on a number of variables, such as the kind of filter you get, where you live, and whether you want to DIY or hire an expert.

Costs between $200 and $500 are typical for an undersink water filtration system. All the following are included in this price: the filter, any extra installation parts needed, and labor expenses if you decide to engage a professional.

How long do Undersink filters last?

Regular monitoring of a standard undersink water filtration system is necessary to avoid the accumulation of impurities that could compromise future water quality.

Some guidelines for monitoring and changing filters are as follows:

  • Change the membranes every two years for reverse osmosis and the additional alkalizers every four years.
  • Change the filter in your home every six to twelve months.
  • Update filters in commercial settings every four to six months.

Do under sink water filters get moldy?

Filters are a breeding ground for cold spores due to their potential dampness and warmth. To prevent mold growth, you should diligently maintain the water filter by replacing or cleaning it according to the manufacturer-set schedule. The solution is to call a professional or replace the water filter yourself.

Pros and cons of countertop water filters

Advantages:

Thanks to a countertop water filter, you can filter water whenever needed. There will be no need to wait to refill pitchers with filtered water. You can receive pure, tasty water with the simple flick of a tap.

For many who have embraced countertop filter systems, the ease of installation is the deciding factor. Remove the aerator from the kitchen tap and connect the diverter valve. This will help direct water to the filter; there’s no need to get beneath the sink.

Disadvantages

They are a nuisance to have on your kitchen counter. There are a lot of us who value every inch of counter space. Since they will always be on display in your kitchen, you should also be happy with their appearance.

Additionally, their quality varies. There are a lot of inexpensive, single-stage models available for countertops, but they aren’t much better than a pitcher filter.

Lastly, these water purifiers will only work on the faucet where you place them; they are called point-of-use filters.

Conclusion

You should feel more at ease installing an undersink water filtration system now that you know the process, which isn’t hard but does require some tool proficiency. The complexity of the plumbing system under your sink is another factor to consider. If your sink has hidden pipes, you must engage a professional plumber. This is because accessing the lines may require removing concrete and even tiles. If you’re unfamiliar with plumbing, it’s best to employ a professional.

How to Install a Whole House Water Filter

How to Install a Whole House Water Filter

By | Water Filtration | No Comments

The goal of any water filtration system, including whole home systems, is to provide clean water free of contaminants. Many urban areas have water that is unfit for human consumption. You can use the clean water from a whole house water filter system for more than just drinking. It’s great for washing clothes, taking showers, and more.

Your whole house water filter installation is as important as the selection procedure. You need to ensure that these systems are properly installed on your property. This will allow you access to potable water, as they are substantial investments with numerous advantages. The main focus is getting the plumbing and fixtures in the house ready for installation.

Where Should You Install a Whole House Water Filter?

A few things need your attention before you consider bringing the tools to install a whole house filter. Among these factors is the placement of your home’s water filtration system. You can ensure that all of the fixtures in your house have access to clean water by installing the filter system at the main water lines. With this setup, all your plumbing fixtures, except outdoor faucets, will have access to clean water. Placing this water filter system wherever you can quickly swap out cartridges and filters is the way to go.

Set it up near the main water shutoff valve, next to the water heater. All appliances that use hot water may have their lifespan extended. Purification is the way to go if you want to keep sediment and other pollutants from damaging your appliances. It is best to install a water filtration system after installing a pressure tank if your water supply comes from a private well.

Steps to help you install a whole house water filter

  • Before the installation, get everything ready

The whole house water filter installation process begins with preparatory work. This entails gathering the necessary tools. In order to identify the water inflow bus of the water pipe, it is best to have the experts from the water filter store perform an on-site examination before they install a whole house water filtering system. There are specific height and space requirements for installing this system. Be sure to plan out the installation space, measure the height, and design the installation diagram of each working water filter. Make sure to mention the power connection’s placement and the direction of the sewage outflow.

  • Find out where the water filtration system for the entire house is located

The power supply, sewage pipeline, floor drain, and power supply are typically reserved. The pre-filter is typically located close to the water meter and main valve. The corresponding facilities should not be exposed to direct sunlight or other heat sources. Furthermore, you should add a check valve if the purifier is too near the water heater. Conducting a site study before installing a whole house water filter is best. This will help choose an appropriate area with drainage pipelines and water access. You should place it at the main water line so that it can purify the water throughout the home efficiently. After that, water can be directed to each location independently.

  • Installing the pre-filter

The pre-filter is an important step in a whole house water purification system. It can remove silt, rust, and big particles from municipal water supplies. In most cases, the pre-filter will be either in the water meter of the inlet pipe or at the location of the main inlet valve. Before installing electricity and water, plan the wiring to reserve the power cord and water outlet. It will be more challenging to wire after decoration.

  • Set up the whole house water filter’s central filtration system

In order to make the wiring more accessible, the central water purifier is usually put under the kitchen sink or another sink in the bathroom. Purifying the water throughout the house is the job of the central water filter. It removes the water from the pre-filter and performs the second filter. Secondary filtration can remove chlorine, bacteria, heavy metals, and other chemical and organic contaminants from water. The water pressure range required to install a whole house central water filter is 0.3-0.35 MPa. Installing a pressure regulator valve is important for high water pressure, and a booster pump is ideal for low water pressure.

  • Install a water softener

While the water filter and the central water softener share identical installation components, there are two distinct varieties of water softeners. You must plug the pump into an electrical outlet to activate it. Install the power connection board beneath the cabinet before installing the water filter. To avoid detracting from the cabinet’s aesthetic or the water softener’s functionality if it is not installed, it is best to make the water softener a hidden function.

  • Checking leakage and flushing

Once you’re done with the installation, turn on the main water valve at the house to see if the pipeline leaks. While you’re at it, manually cleanse the water filter both ways. To flush, turn the control valve to the on position. Make sure the control valve is set to run once flushing is finished. Determine the estimated flushing time and adjust the control valve for various control valves.

Lastly, make sure the water filter is on, open the main tap water valve, and check the connections of each pipeline to make sure the system is usable.

Are whole house water filters worth it?

A whole house filtration system is typically worthwhile if your worry is about the health impacts of using your water and you are unhappy, disappointed, or concerned about the water quality in any way.

Whole home filtration systems:

  • Remove harmful contaminants from water by filtering it.
  • Usually, it won’t affect your water pressure (if the system is appropriately sized).
  • Ensure access to clean shower water.
  • Give you a solution that does everything, so you don’t have to put separate filters everywhere.
  • Ensure you have access to clean water for all your household needs, including bathing and cooking.
  • Decrease your energy costs and do your part for the environment by doing away with single-use water bottles and other wasteful practices.
  • Provide water with an improved taste.
  • Safeguard your water heater, water line, and all of your home’s appliances.

How much should a whole house filter cost?

Installing this system might cost anything from $850 to $5,500. Installing a whole house reverse osmosis system can remove 99.9 percent of water pollutants for $4,700 to $8,200. However, reverse osmosis produces the majority of wastewater.

Is it okay to drink tap water with a whole house filter?

Your water will be safer to drink from every tap when you install a whole house water filter. It will remove impurities as they enter the system.

Advantages and disadvantages of whole-house water filter systems

Pros:

  • More convenience
  • Gets rid of a variety of pollutants
  • Possible advantages to one’s health
  • Friendly to the environment

Cons:

  • Regular maintenance is necessary
  • Initial cost

How long do whole house water filters last?

To ensure you’re getting the highest quality water from your tap, installing a whole house water filtration system is a good idea. You’ll get numerous benefits when you install a whole house water filter—for example, improved water taste and cleaner water for washing clothes and dishes. Your water filtration system does have a lifespan, much like an HVAC system.

How to Install a Whole House Water FilterThe Longevity of Your Whole House Water Filter

The average number of gallons of water your household uses is a major factor in determining the answer. When your water main is on, your whole house water filter begins to function. Your home water filter will gradually become clogged as it catches as many obstructions as possible while operating water-using appliances like the dishwasher, kitchen sink, and shower. There is usually a recommended number of gallons of water that you can use before needing to change a water filter. It can be difficult to keep track of water usage to such an acceptable degree, but that recommendation usually gives a good idea of when to install a new filter.

Replacement of the pre-filter should be done every 6 months, while you should change the post-filter and carbon filter annually. This depends on average usage. However, other factors besides water use dictate how frequently you should change your filters. The frequency at which you should replace your filter is directly proportional to the pre-filtration water quality. Your filters will have a longer lifespan and require less effort to remove particles like salt and silt from water. However, consider replacing your filters more frequently than suggested if your water is very mineralized and heavily metal-laden.

Conclusion

No rocket science is involved when you want to install a whole house water filter. Hire a professional plumber if you are unsure of what you’re doing or don’t have the necessary expertise. For assistance with both the installation and ongoing maintenance of your water filtration system, it is best that you contact a professional water filtration system company.

How to Clean a Brita Pitcher Filter

How to Clean a Brita Pitcher Filter

By | Water Filtration | No Comments

If you clean your Brita pitcher filter infrequently or replace the filter cartridge often, mold can grow on it. Other potential sources of mold growth include using water from a well or just keeping the filter equipment exposed to dark conditions. Use a weak bleach solution to scrape the mold away. Quickly dispose of the contaminated cartridge.

A Brita pitcher filter is a significant investment if you want your water to taste and smell better. On the other hand, if your filter contains black mold patches, it means it has been compromised. Do not expect your Brita product to eliminate mildew or any other type of organic debris. You need to act quickly if you discover mold in your filter.

Here are the main steps involved in cleaning a Brita pitcher filter

  • Disassemble the utensil

First things first, drain the pitcher and separate the product into its parts. Although it may appear simple, disassembling these carefully crafted items is quite challenging. Cleaning the inside of the pitcher, in particular, might become much more challenging. On the other hand, options like zero water pitchers are typically relatively easy to clean.

  • Detaching the screen

Take your time removing the Brita filter’s particular tank; it’s an integral part of the device. In order to keep the pitcher clean, it is essential to change the screen periodically. So, replace it with a fresh screen for complete sanitization if you haven’t already.

Because it promotes the growth of unsanitary substances and bacteria if the filter screen is not changed on a regular basis, this is one of the primary arguments in favor of doing so. But if you don’t have a new screen, you’ll need to clean the filter well. This requires gentle rinsing with lukewarm water, followed by thorough drying in an environment free of pollutants.

  • Wash the pitcher well

The crucial component will come when you have successfully dismantled the pitcher. To wash the individual parts of a Brita pitcher filter, you must first create a cleaning solution by mixing dish soap with water. You only need to immerse the pieces in the solution for optimal results for around an hour.

After this is complete, remove each component one by one and give it a good cleaning until you’re satisfied with the cleanliness. But if you’re short on dish soap, a high-quality detergent solution will do the trick for a more thorough cleanup.

  • Scrubbing the mildew

After cleaning, if you still see mold, combine white vinegar and water in a basin. Next, immerse the components in the mixture and scrub until all mildew is removed.

  • Rinse it and set it aside to dry

Once you’ve confirmed that the product is mold- and dirt-free, rinse each portion separately. Soaking the components individually in lukewarm water will yield the finest results. After that, find a spot with good ventilation to let the parts dry.

Be careful to wait until every piece is dry before putting the set back together. Removing it while the parts are damp will make future mildew growth easier. That’s why, just to be safe, you should always use a washcloth.

  • Prepare the new filter

The need to soak the new screen before use will likely be eliminated in later versions of Brita pitcher filters. However, you should make use of the opportunity to prepare the new filter while the other pieces are put out to dry completely.

But the new screen is a breeze to construct after getting the hang of the manual. However, you may need to put in more effort if you’re using an older pitcher.

  • Reassemble the pitcher

As you might expect, the last thing to do is put everything back together. You should fill it with water and disperse it before using it normally again. This aids in removing any carbon dust that may have been lodged inside the pitcher’s brim. In the end, your Brita pitcher filter will be spotless.

Tips for Cleaning a Brita Pitcher Filter

  • Avoid immersing the filter monitor’s electrical components

You shouldn’t immerse the digital filter monitor that came with a Brita pitcher filter in the cleaning solution. Doing so will destroy the electrical parts and void your warranty. After a quick wash in warm water, remove it from the water and allow it to air dry. Then, put it back on the pitcher.

  • Clean with a rag or sponge

Scratches are easy to make on the plastic surfaces of the Brita pitcher filter. You can ruin the pitcher’s shiny finish using a bristle brush. While cleaning, make sure you use a sponge or rag.

  • You shouldn’t use soap to clean the filter

Reusing the filter is as simple as rinsing it. You will never be able to remove all of the soap residue by using it to clean it. The result will be an unpleasant, soapy flavor in your water.

Why Do Brita Filters Get Mold, and How to Remove It

Why it gets mold

Organic matter in water

Lastly, because mold grows on organic materials, a high concentration of organic substances in the water will increase the likelihood that a Brita pitcher filter will have mold.

Humid conditions

The pace at which mold grows in a Brita pitcher filter may also depend on where you keep it.

Humidity is essential for mold growth. Thus, it’s likely that your pitcher will be destroyed if stored in a humid space (like a kitchen that produces a lot of steam from cooking).

Not cleaning enough

Moldy Brita filters are most frequently caused by a failure to clean them on a regular basis. Mold can grow on the walls and inside the filter cartridge if you don’t clean and replace the filter as directed.

When you don’t replace the filter regularly, it is particularly vulnerable to mold growth. This is because it stays wet all day, providing the perfect environment for mold spores to multiply.

How to Remove Mold from a Brita Filter

  1. Take safety measures

Wear protective gear like a mask and cleaning gloves to reduce contact with mold spores.

  1. Removing the filter

Remove the Brita pitcher’s filter by unscrewing the housing.

  1. Washing everything

Fill a basin with hot water and dish soap to clean the filter housing, pitcher, and lid. Use an old toothbrush or sponge to remove the mold from the components. Pay close attention to the nooks and crannies.

  1. Rinse and dry

After rinsing, set the components aside to dry naturally.

  1. Replacing the filter

Before installing the replacement filter into the housing, make sure to flush with flowing water.

  1. Filter a batch of water

Fill the Brita pitcher filter with water, let it filter for a while, and then pour off the filtered water.

Can vinegar clean water filters?

You can clean water filters with vinegar if you want to extend their life a bit before throwing them out. However, this may not be a long-term solution. This is because filters get old, and the activated carbon gets too degraded to work anymore.

Conclusion

Any decent water pitcher will be clean. Both you and the pitcher’s filter will benefit from a thorough cleaning. Leaving your pitcher uncleaned for an extended period of time can have adverse effects on your health. The ability of your water filter to remove potentially harmful substances from your tap water will diminish as dirt accumulates on it. Actually, it could accomplish the opposite and introduce germs to the water you drink. The pitcher filter is an excellent breeding ground for bacteria because of its damp atmosphere. Therefore, protect your health by keeping your Brita pitcher filter clean.

Is It Okay for You to Rinse and Reuse a Whole House Water Filter?

Is It Okay for You to Rinse and Reuse a Whole House Water Filter?

By | Water Filtration | No Comments

If you want to ensure your home’s water is safe to drink and use, you should get a whole house water filter. It needs frequent servicing, just as many important appliances do. While the lifespan of a whole home water filter is significantly greater than that of a point-of-use filter, it is still necessary to repair some components at regular intervals.

A whole house water filter requires a minimum of 5 minutes of flushing time. Put the water back on the tap to turn on the filter, and let it run for five minutes. This kills any bacteria or other microbes that may have settled in.

What will happen if I don’t change the filter in my whole house water filter system?

The purpose of a whole house water filter is to purify the water supply by removing contaminants. They vary in size from rust and sediment fragments, which are huge particles, to lead and chlorine, which are smaller contaminants. The filter’s capacity to remove contaminants from your water will diminish as the media gets clogged with these contaminants over time.

Water quality might be compromised if a whole house water filter system isn’t replaced on a regular basis. For instance, you might notice a change in the odor or taste of your water. Also, the water flow rate could decrease when there’s a clog in your filter. Failure to replace the filter may lead, in severe instances, to introducing new contaminants into your water supply.

What filters should you replace?

Complexity abounds in a whole house water filter. In order to give your home safe, clean water, it typically comes with a number of different filters. An array of filtering technologies, including salt-free water softeners, activated carbon, UV, sub-micron-post, copper-zinc, and mineral stone filters, can be included in your home’s water filtration system.

The pre-sediment filter is an integral part of any whole house water filter. One of the initial filters that water goes through is the pre-sediment filter. Silt, rust, and sediment are all eliminated.

Depending on its volume, you need to replace the tank every 3 to 10 years, regardless of the filters that make up your whole house water filter system.

Maintenance of a whole house water filter

Central water filtration systems like Brita and Whirlpool are very low-maintenance. The built-in filter is set to self-clean every fourteen days. Instead of buying and installing a new filter, it cleans, flushes, and drains the old one.

Unless the weather turns bad or you don’t use the filter for more than a month, you only need to maintain a water filtration system when the weather turns bad.

Inspecting regularly

Make sure to check your whole house’s water filter regularly. As part of these checks, make sure the filter housings are clean, look for any signs of leakage, and evaluate the filter cartridges’ condition. This could be necessary monthly or annually, depending on the water usage.

Extra simple things to do when maintaining a whole house water filter

Consider performing these additional maintenance tasks and updating your whole house water filter.

  • Maintenance before a Vacation

You should turn off your system if you will be absent for a long time. The last thing you want to find when you get home is a burst water filter as a result of pressure buildup or a blockage. Avoid putting yourself in danger that way, even if your system contains a valve that limits pressure.

  • Regular Cleaning Routine

Maintaining a clean whole house water filter will extend its life and improve its performance. Take out the housing unit and wash it with warm water and a mild cleaning agent once a year or so. Also, clean the sediment pre-filter if your model has one.

Prevent a whole house water filter from freezing

Take precautions, particularly in cold weather, to ensure that your whole home water filter does not freeze if it is outdoors. The filter housing could suffer damage or leak due to freezing. Doing at least one of the following will keep things from freezing:

  • Take out all the hoses and drain the system before winter hits.
  • Cover the device with an insulating blanket or tarp.
  • Transfer the setup to a warmer location.

Key Takeaways

If your house filter is cartridge-based, change it every three to one year. To keep your home’s water quality intact, replacement is necessary on a regular basis.

Is It Okay for You to Rinse and Reuse a Whole House Water Filter?
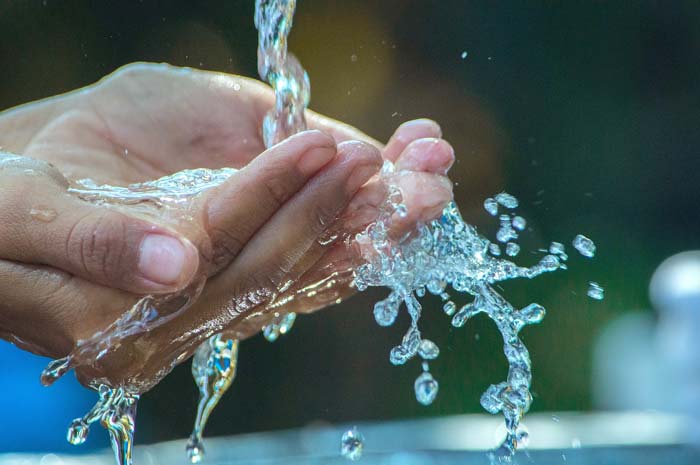
In general, to change the cartridge in a whole house water filter, follow these steps:

  1. Turn off the water main, empty the tank, and let the pressure in the system go.
  2. Take the filter housing and unscrew it.
  3. Take the old filter element out.
  4. Inspect the O-ring.
  5. Put the housing back in place and insert the fresh cartridge.
  6. Make sure there are no leaks by turning on the water supply again.

Clean the housing unit periodically using a mild cleaning solution in addition to replacing the filter cartridges.

Conclusion

Despite the occasional cleaning, a whole house water filter is an investment worth making for the long haul. The process eliminates potentially harmful metals and chemicals and increases the longevity of your plumbing and appliances. This water system maintenance checklist is a must-have for anyone concerned about the quality of their drinking water. Contact the professionals at Express Drainage Solutions right away if you have any questions regarding the advantages of a whole house water filter.